To connect your specific SharePoint site to WordPress please refer to the steps given below:
1. Steps for Azure AD configurations.
- Login to your Azure Admin portal.
- Go to your Azure app registration application.
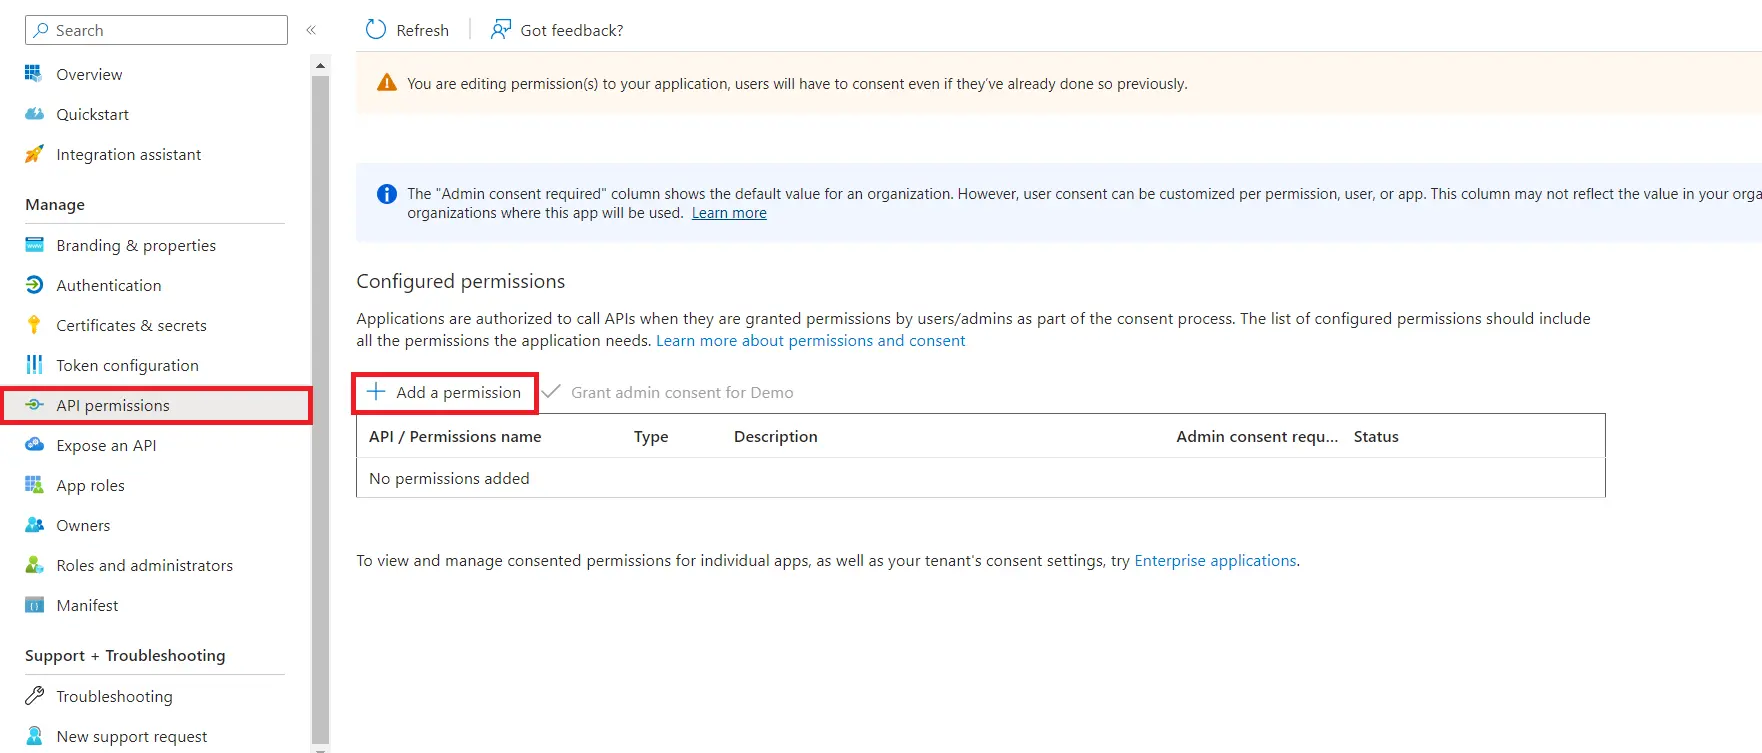
- Navigate to API Permissions from left panel and click on Add a permission button.
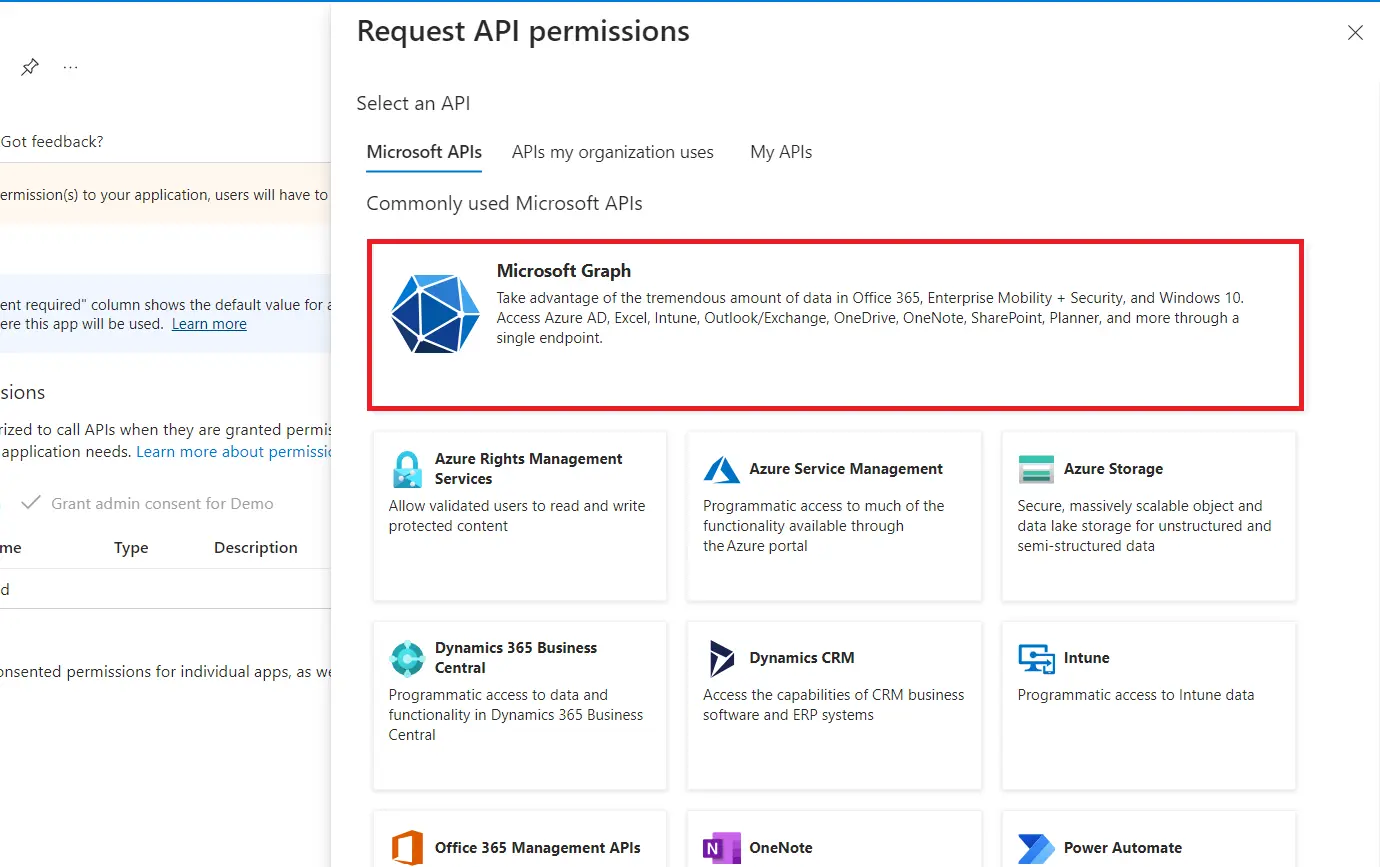
- Select Microsoft Graph in Request API permissions section.
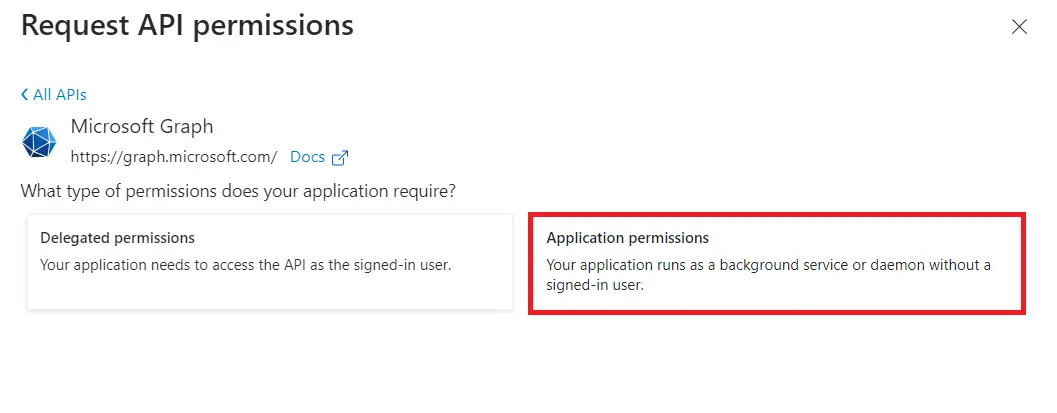
- Select Application permissions as a type of permissions.
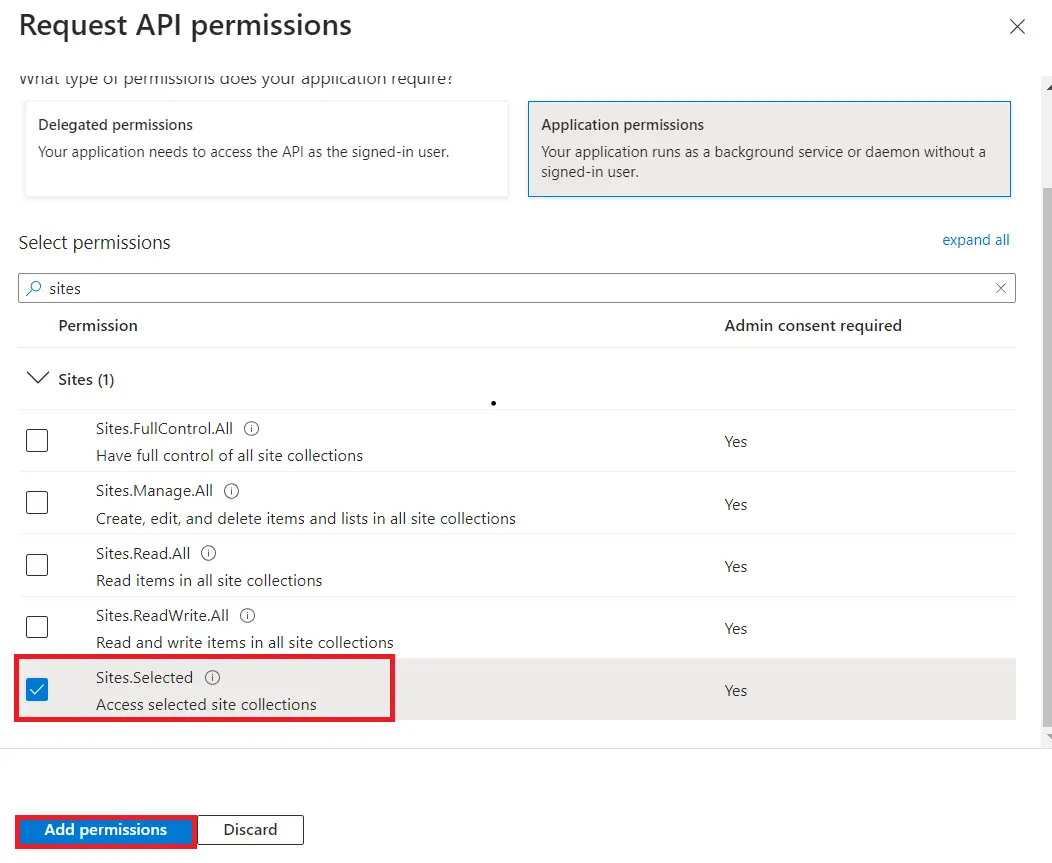
- Search for sites and select the Sites.Selected option from the list then click on Add permissions button.
- Click on Grant admin consent for <Tenant_Name> button and then click on Yes.
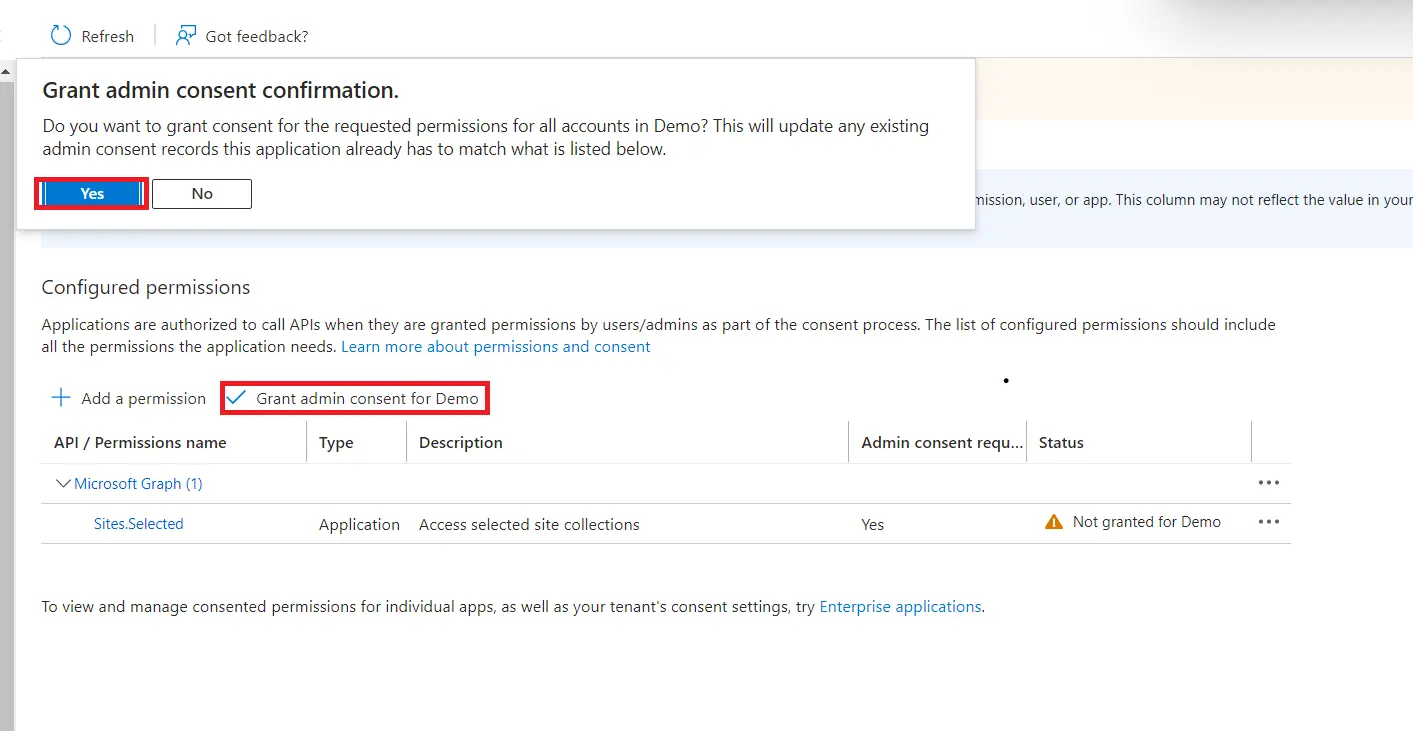
2. Graph Explorer to Add permissions for Specific SharePoint site.
- Login to your MS Graph Explorer Portal with your Global Admin account.
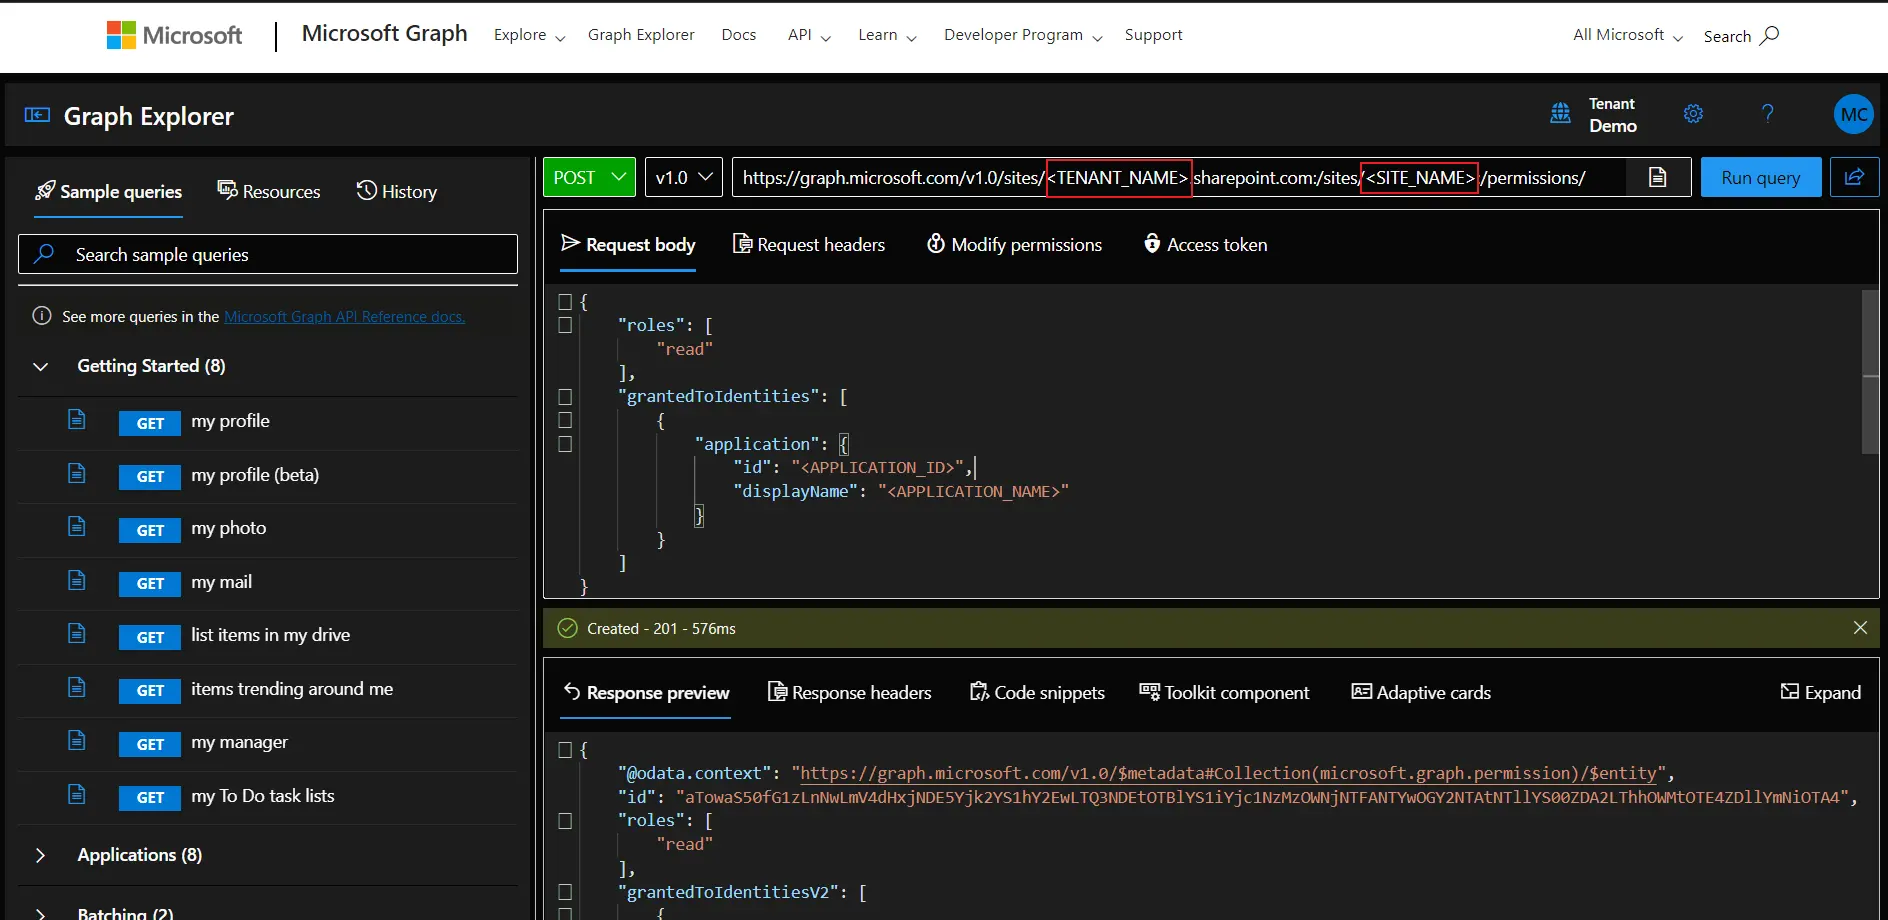
- Once logged in click on the given link to populate the API query in your graph explorer automatically. [Click here to Populate API query].
- Now replace theTENANT_NAME and SITE_NAME with your Azure AD tenant and SharePoint site name.
- Then, replace the Application ID and Name as per your application created in the Azure AD app registrations. For eg please refer below : https://graph.microsoft.com/v1.0/sites/<Tenant_Name>:/sites/<Site_name _only>:/permissions
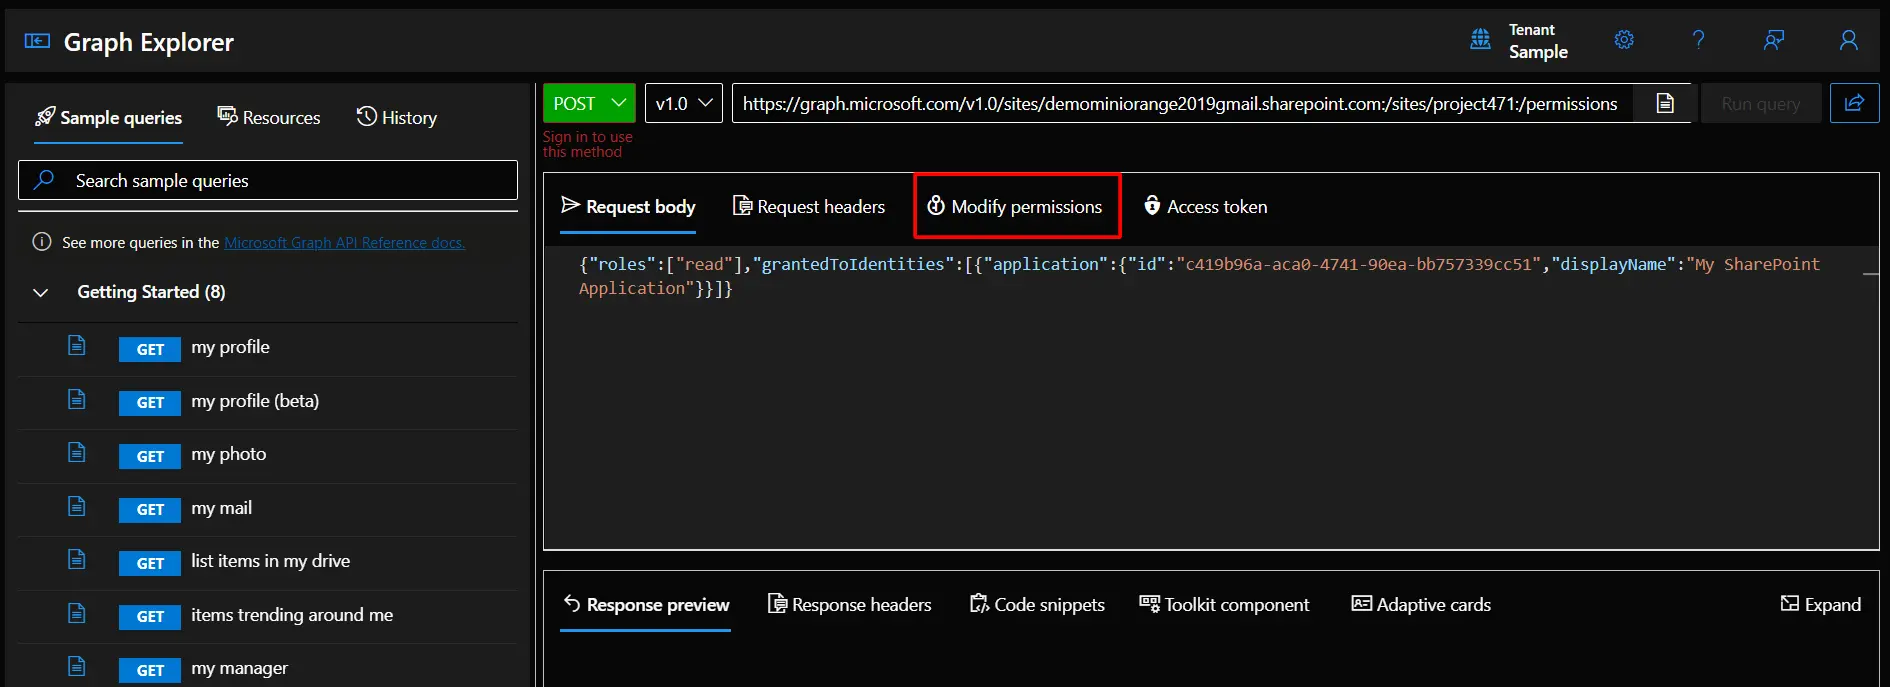
- Once you have logged in then click on the Modify permissions tab.
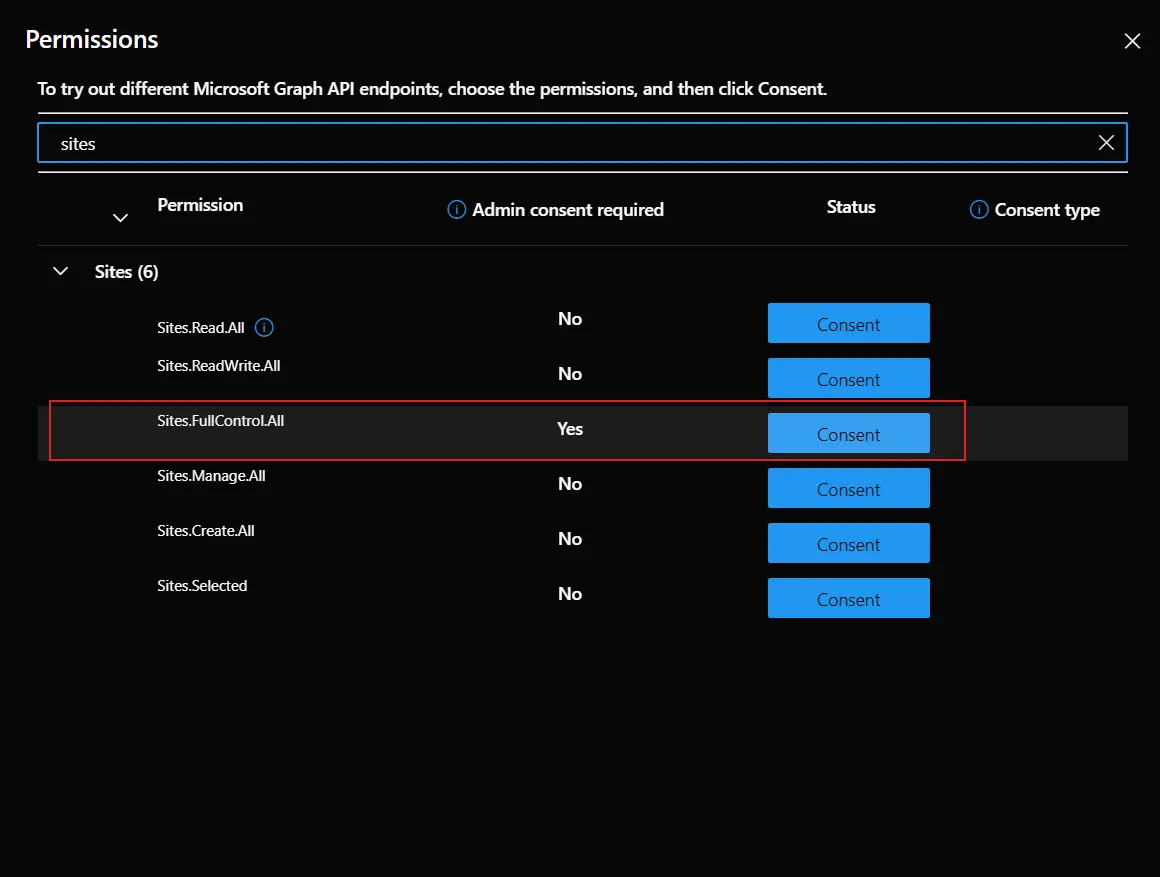
- Then click on Open the permissions panel as shown below.
- After that search for sites and click on Consent button for Sites.FullControl.All permission
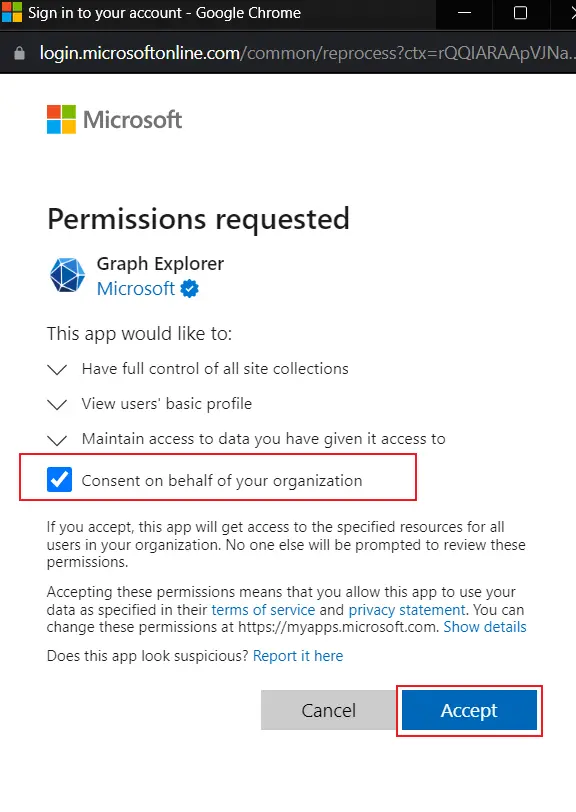
- Once you have provided with the site consent you will be asked for the MS Graph Explorer Consent, then Enable the checkbox and click on Accept button to proceed further.
-
You can also refer the the example API Endpoint given below:
https://graph.microsoft.com/v1.0/sites/demominiorange2019gmail.sharepoint.com:/sites/project471:/permissions/ - Example request body for read and write permissions:
- Read permission
- Write permission
- If you are seeing something same as below response, you’ve completed all the steps successfully.
1. Tenant Name: Name of your sharepoint organization.
2. Site Name : Name of your sharepoint site for which you want to
provide access.

    {
        "@odata.context":
    "https://graph.microsoft.com/v1.0/$metadata#Collection(microsoft.graph.permission)/$entity",
        "id":
    "aTowaS50fG1zLnNwLmV4dHxjNDE5Yjk2YS1hY2EwLTQ3NDEtOTBlYS1iYjc1NzMzOWNjNTFANTYwOGY2NTAtNTllYS00ZDA2LThhOWMtOTE4ZDllYmNiOTA4",
"roles": [
  "read"
],
 "grantedToIdentitiesV2": [
  {
   "application": {
    "displayName": "My SharePoint Application"
    "id": "c419b96a-aca0-4741-90ea-bb757339cc51",
   }
  }
 ],
 "grantedToIdentities": [
  {
   "application": {
    "id": "c419b96a-aca0-4741-90ea-bb757339cc51",
    "displayName": "My SharePoint Application"
   }
  }
 ]
}
3. Test Connection
- Go to plugin settings on your WordPress admin dashboard.
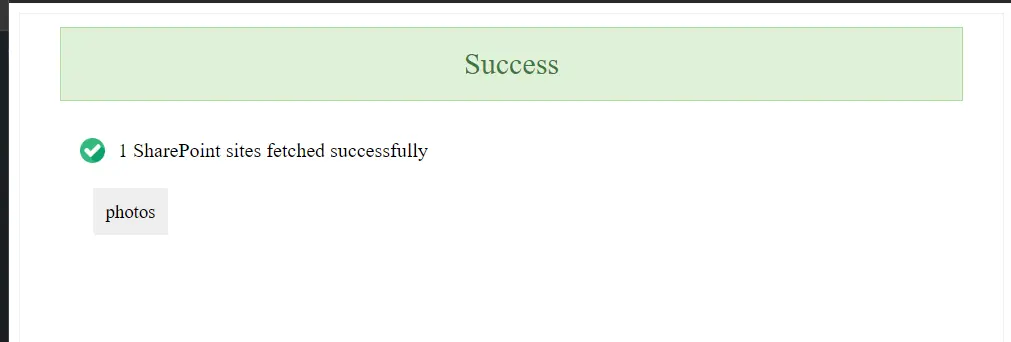
- Click on Test Connection button.
If you are looking for anything which you cannot find, please drop us an email on office365support@xecurify.com