To enable automatic discounts using customer tags in Shopify through the LockOn application, follow these steps:
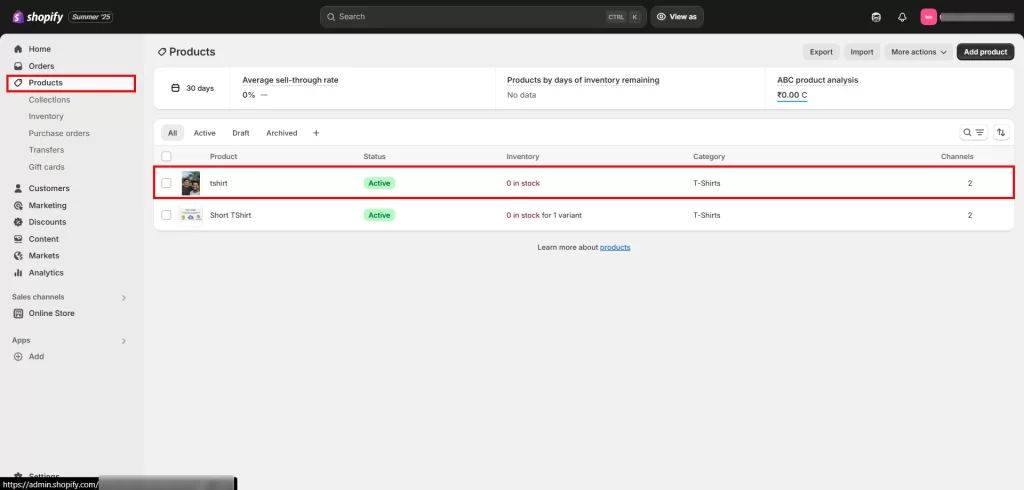
- Log in to your Shopify admin and navigate to the Products section. Select the product to which you want to apply the discount.
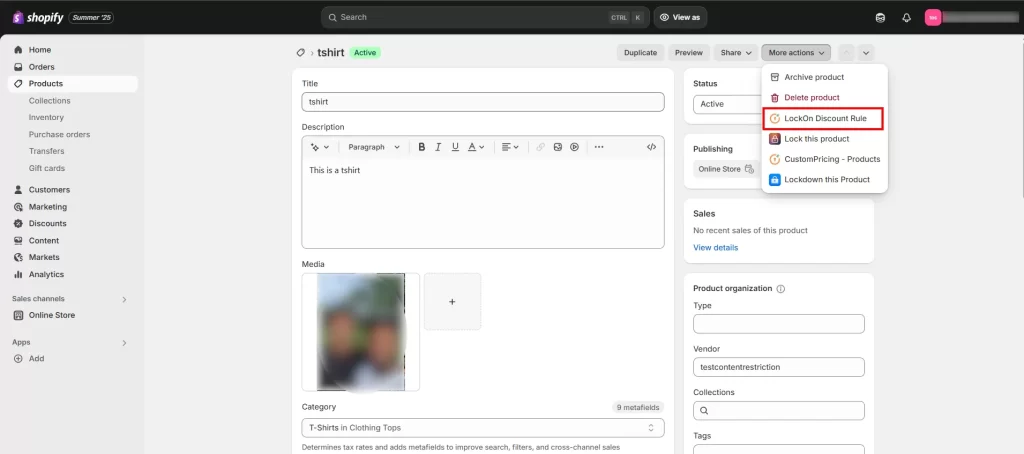
- From the More Actions dropdown menu, select the LockOn Discount Rule.
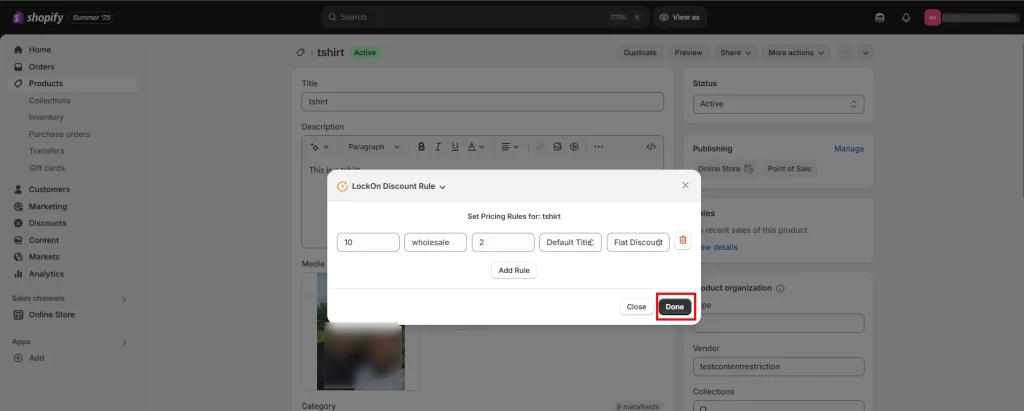
- Provide a rule name and specify the customer tag. Then, define the discount type; options include flat discount, fixed price, or percentage-based discount.
- Click on Done.
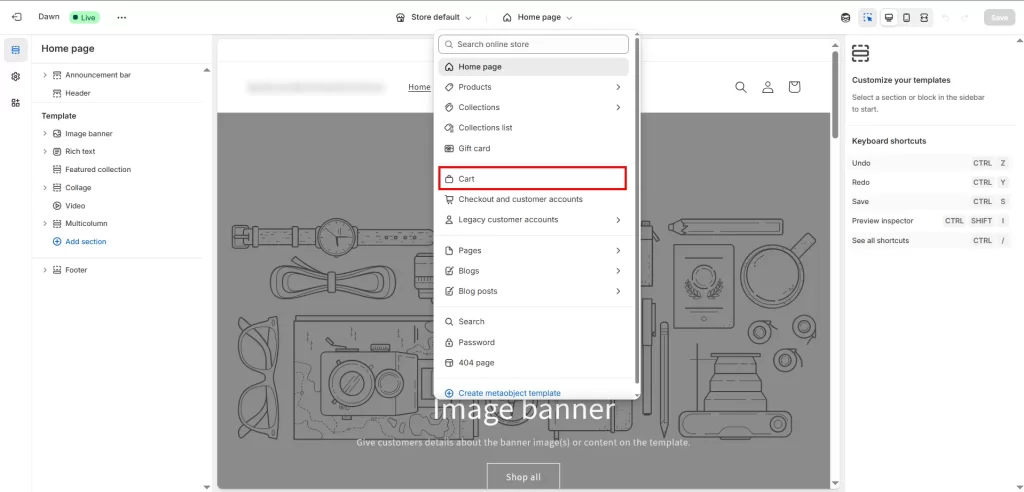
- Go to the Online Store tab and select Themes, then click the Customize button.

- Let us look at the Auto Discount Checkout extension being configured in both pages; Cart and Products.
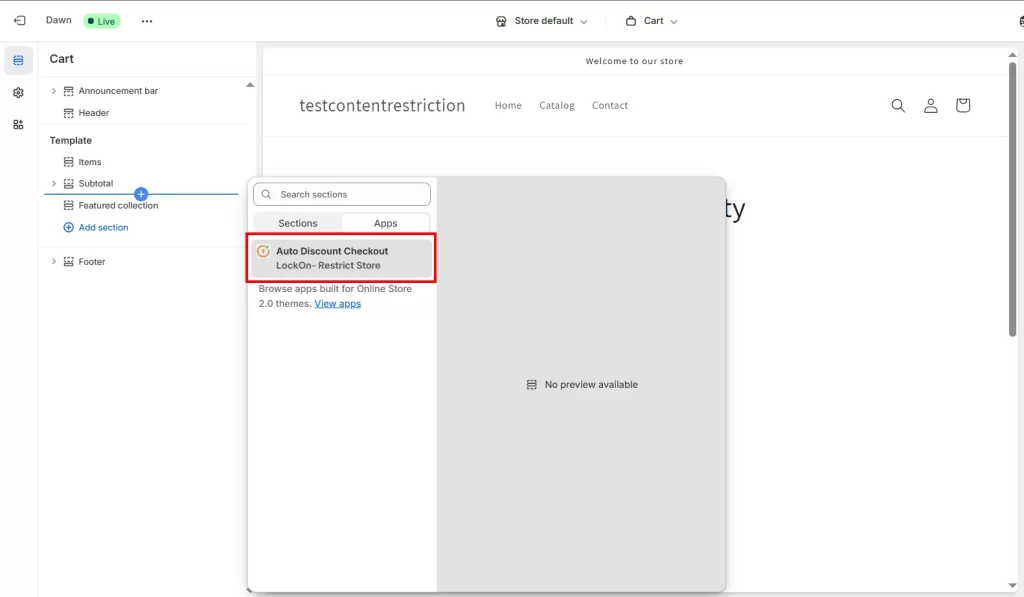
A] Cart page
- In the dropdown shown below, choose the Cart page.
- Under the Subtotal section, add the Auto Discount Checkout section provided by the LockOn application.
- Click on Save to apply changes.
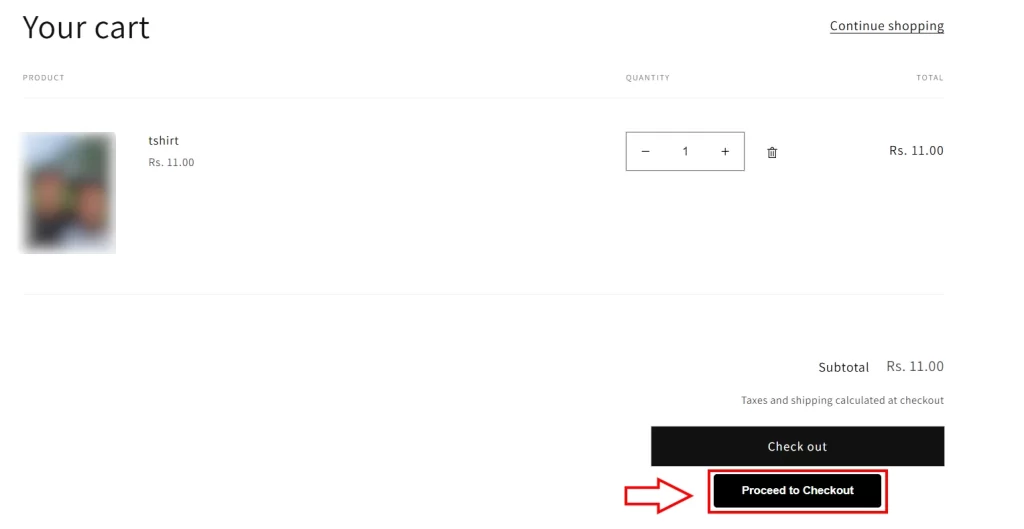
- The discount will only be applied if you click the highlighted “Proceed to Checkout” button. If you click the “Check Out” button instead, the discount won’t be applied.
- Please note this button won’t be visible in the store unless you’re logged in and have the right customer tag. If you do, you’ll be able to see the button.
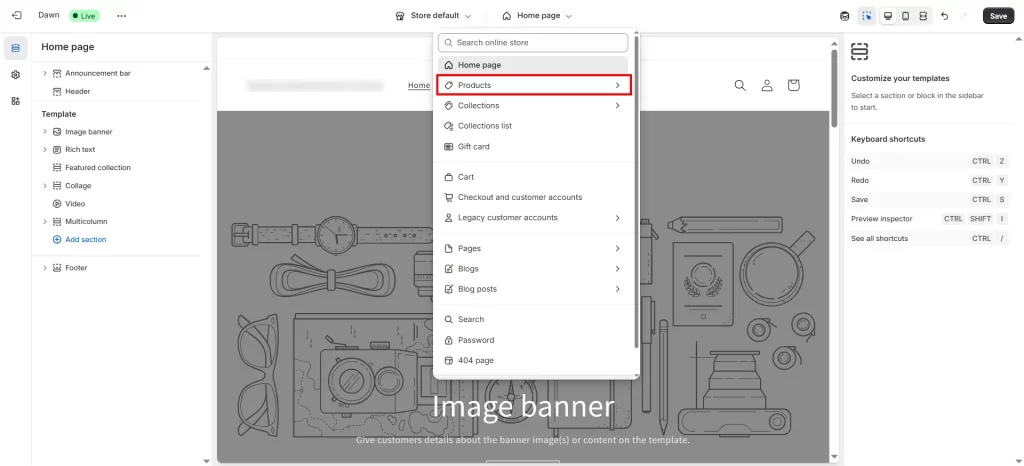
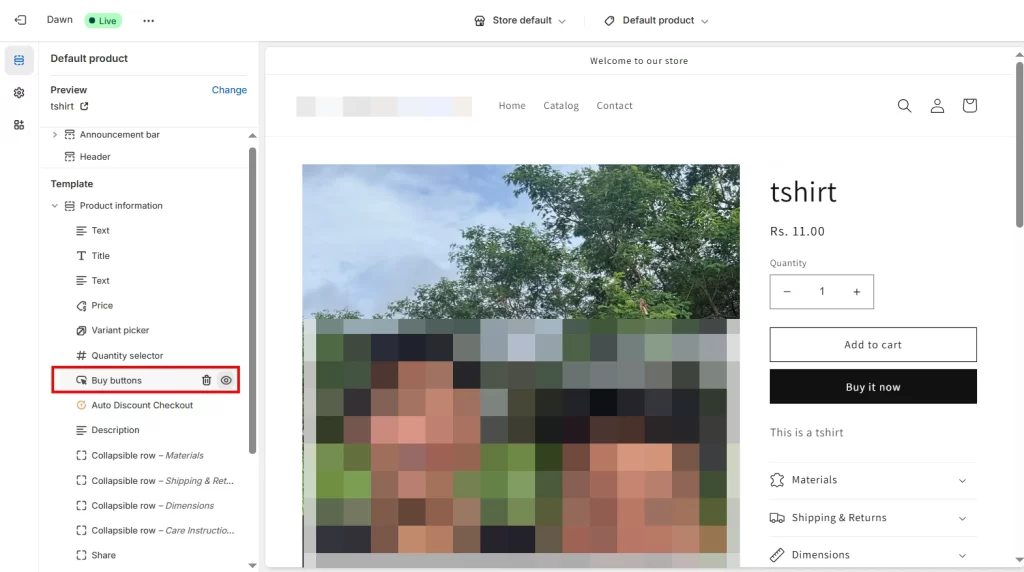
B] Products page
- In the dropdown shown below, choose the Products page.
- Under the Product Information section, add the Auto Discount Checkout section provided by the LockOn application.
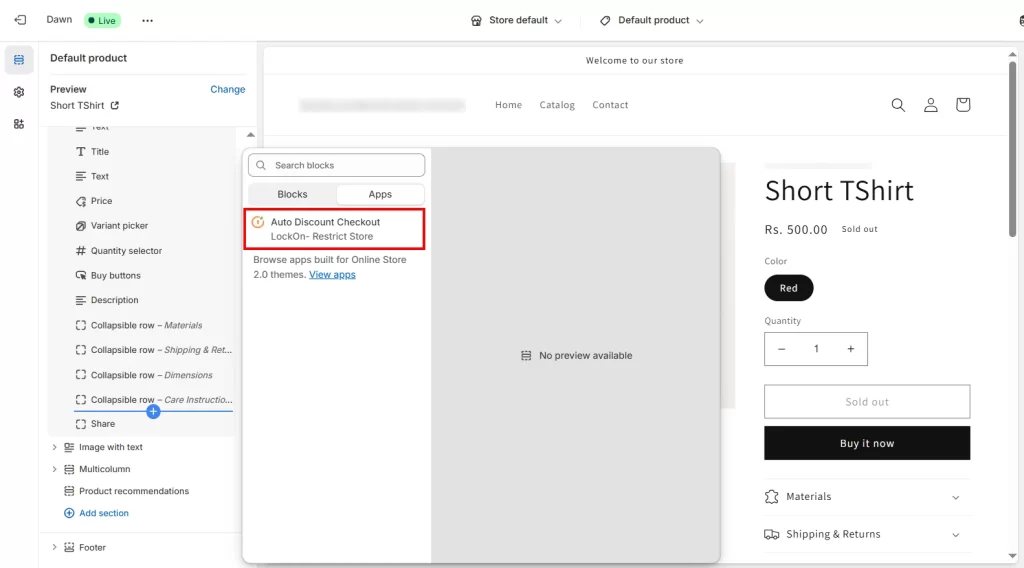
- Click on Save to apply changes.
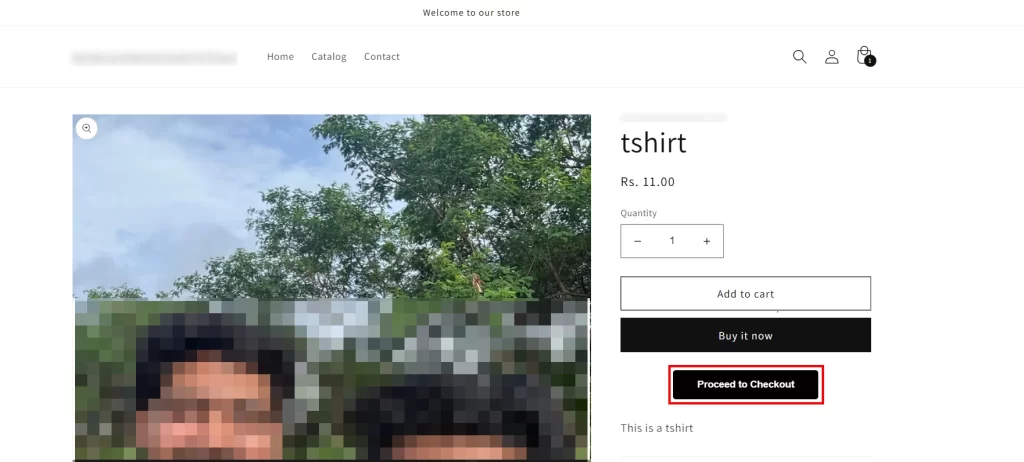
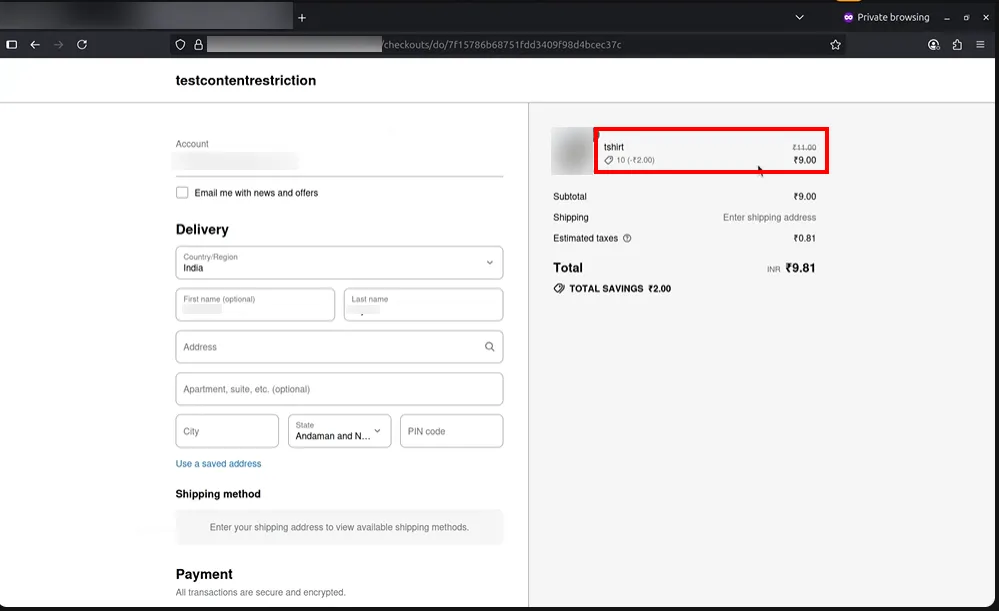
- The discount will only be applied if you click the highlighted “Proceed to Checkout” button. If you click the “Buy it now” button instead, the discount won’t be applied.
- You can also choose to hide the “Buy it now” button and display only the “Proceed to Checkout” button.
- Please note this button won’t be visible in the store unless you’re logged in and have the right customer tag. If you do, you’ll be able to see the button.
- Once configured in the desired page, the discount will automatically be applied at checkout for customers matching the specified tag.
If you need further assistance with the setup, feel here to contact our support team.