The following steps need to be followed:
- Once you save the plugin configuration, you will see the Test Configuration button.
- Click on the Test Configuration button, and you will get a login window to login into your provider/application.
- Once you are logged in, you will get the table with Attribute Names and Values you are receiving from your Identity Provider.
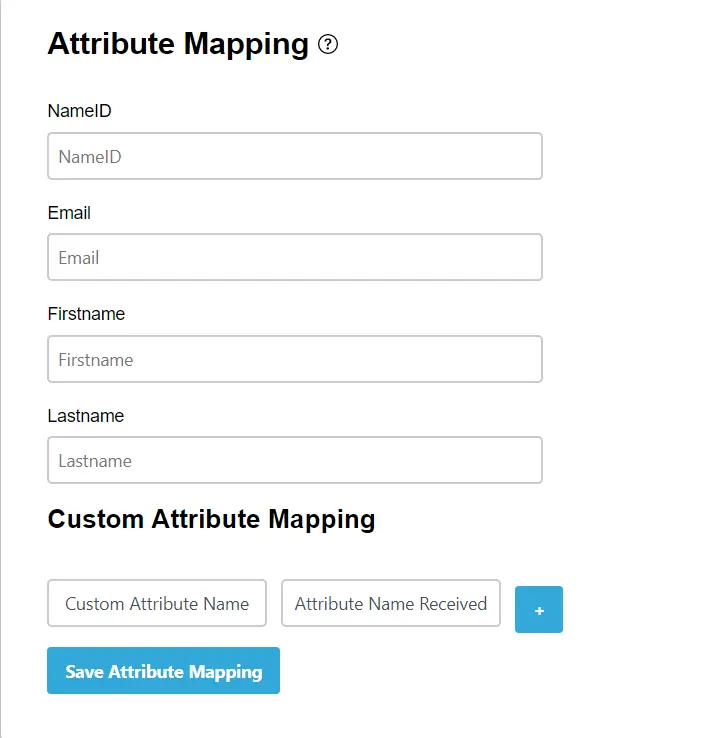
- Now, go to Attribute/Role Mapping Section/Tab, and map custom attributes with the attribute name provided in the Test Configuration table, as shown in the below screenshot.

If you continue to experience problems despite all of this, please feel free to contact us at aspnetsupport@xecurify.com.