If you're an existing customer, you'll notice that we've revamped the Shopify Single Sign-On UI and eliminated theme code dependencies. The new automated setup uses Shopify extensions, ensuring your SSO runs smoothly with improved features and flexibility.
If you're an existing user, here's what you should do:
- Go to your SSO app dashboard.
- Check if you're seeing any of the error messages below:
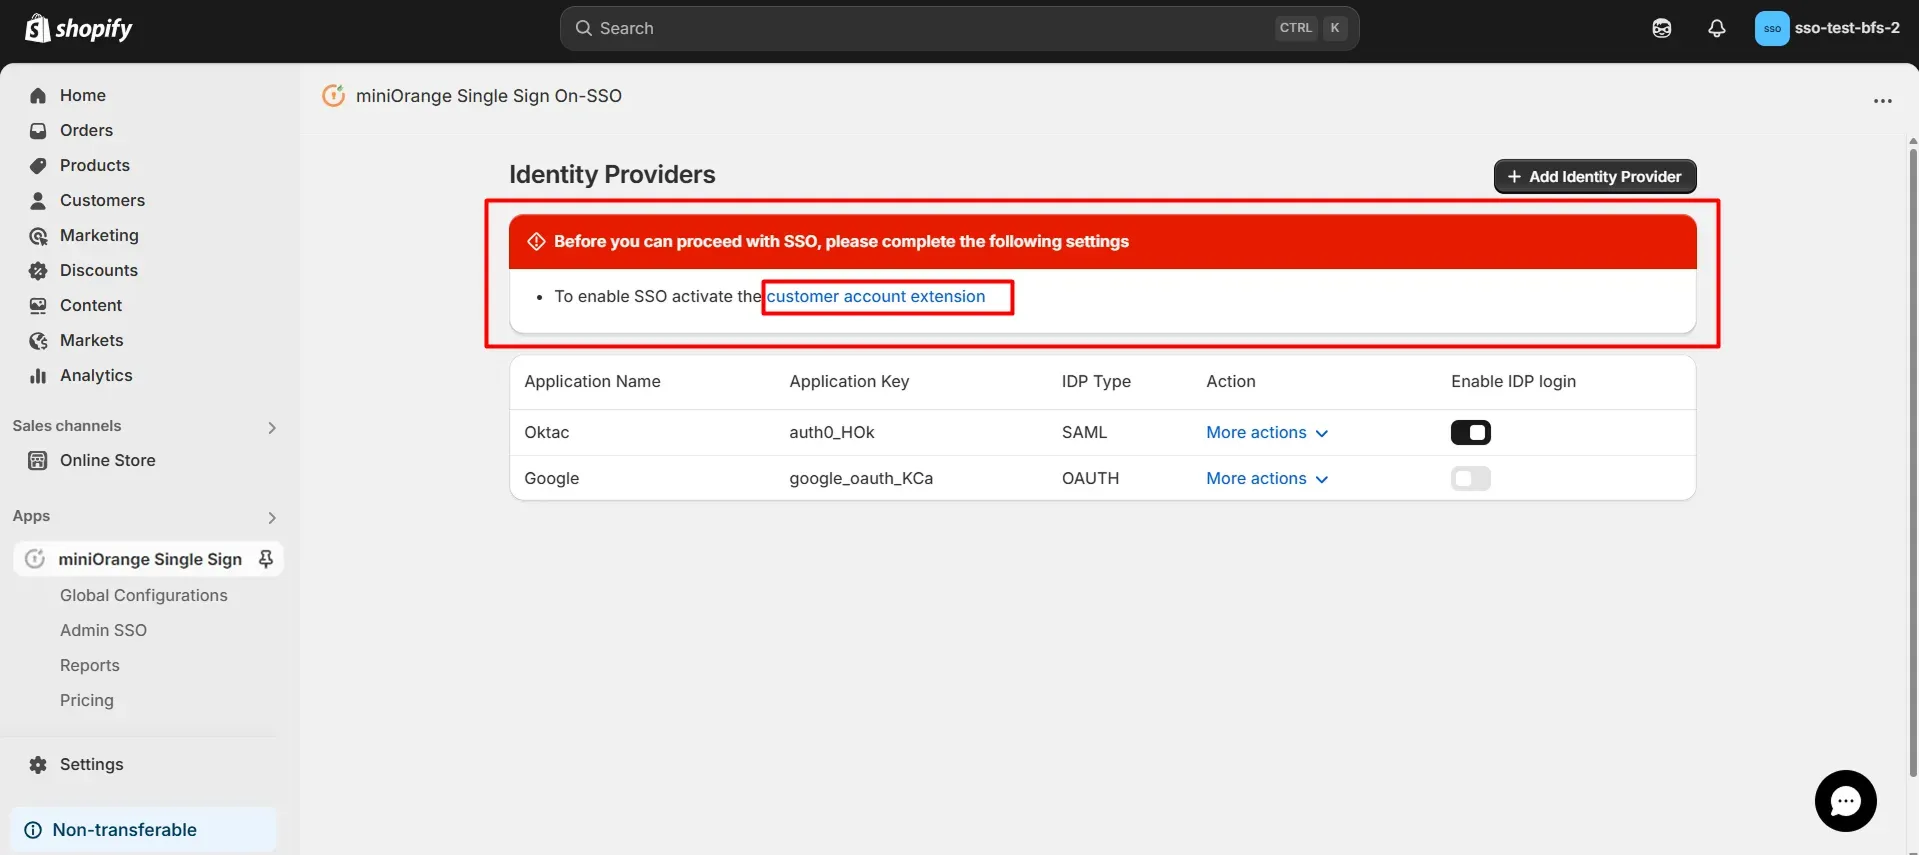
- If you're seeing any of these alerts, follow the given steps to complete your migration:
- Auto-redirect to IdP
- Login widget extension
- Multipass
1. Follow the steps below to resolve the Auto-redirect to IdP error:
- Open the miniOrange Single Sign-On app in your Shopify store.
- Go to the Global Configurations section in the left menu.
- Enable the Auto-Redirect to IDP feature under the Store Access Settings.
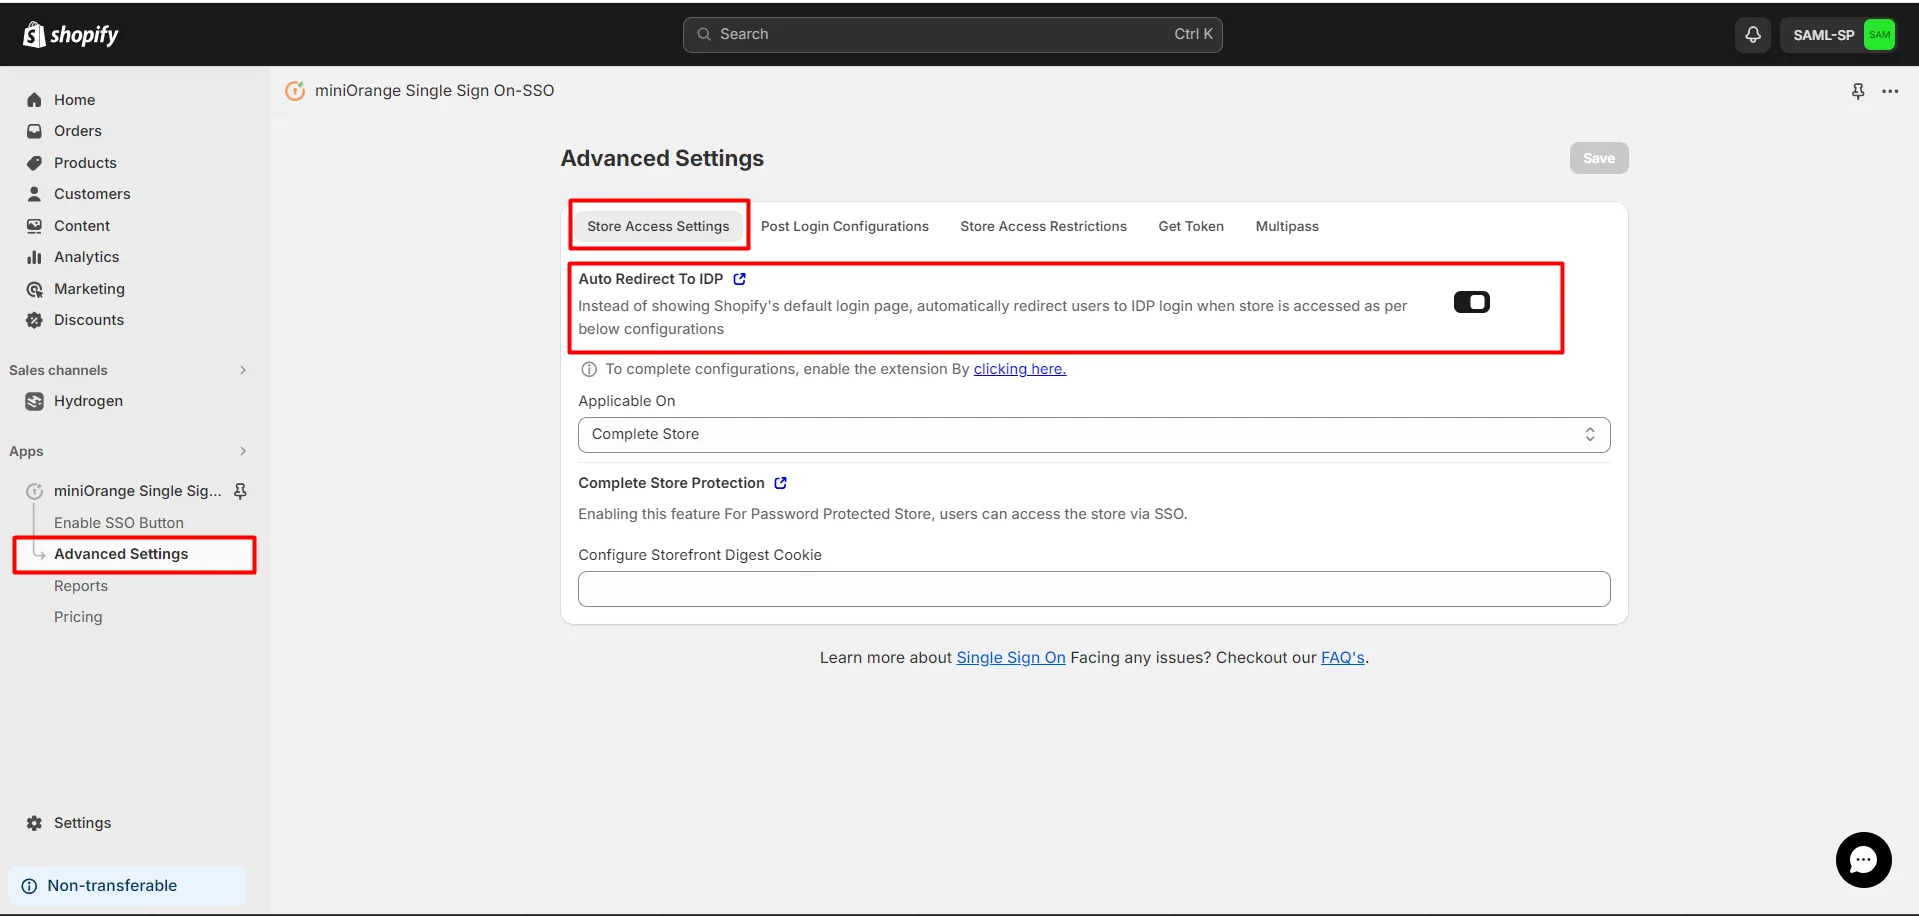
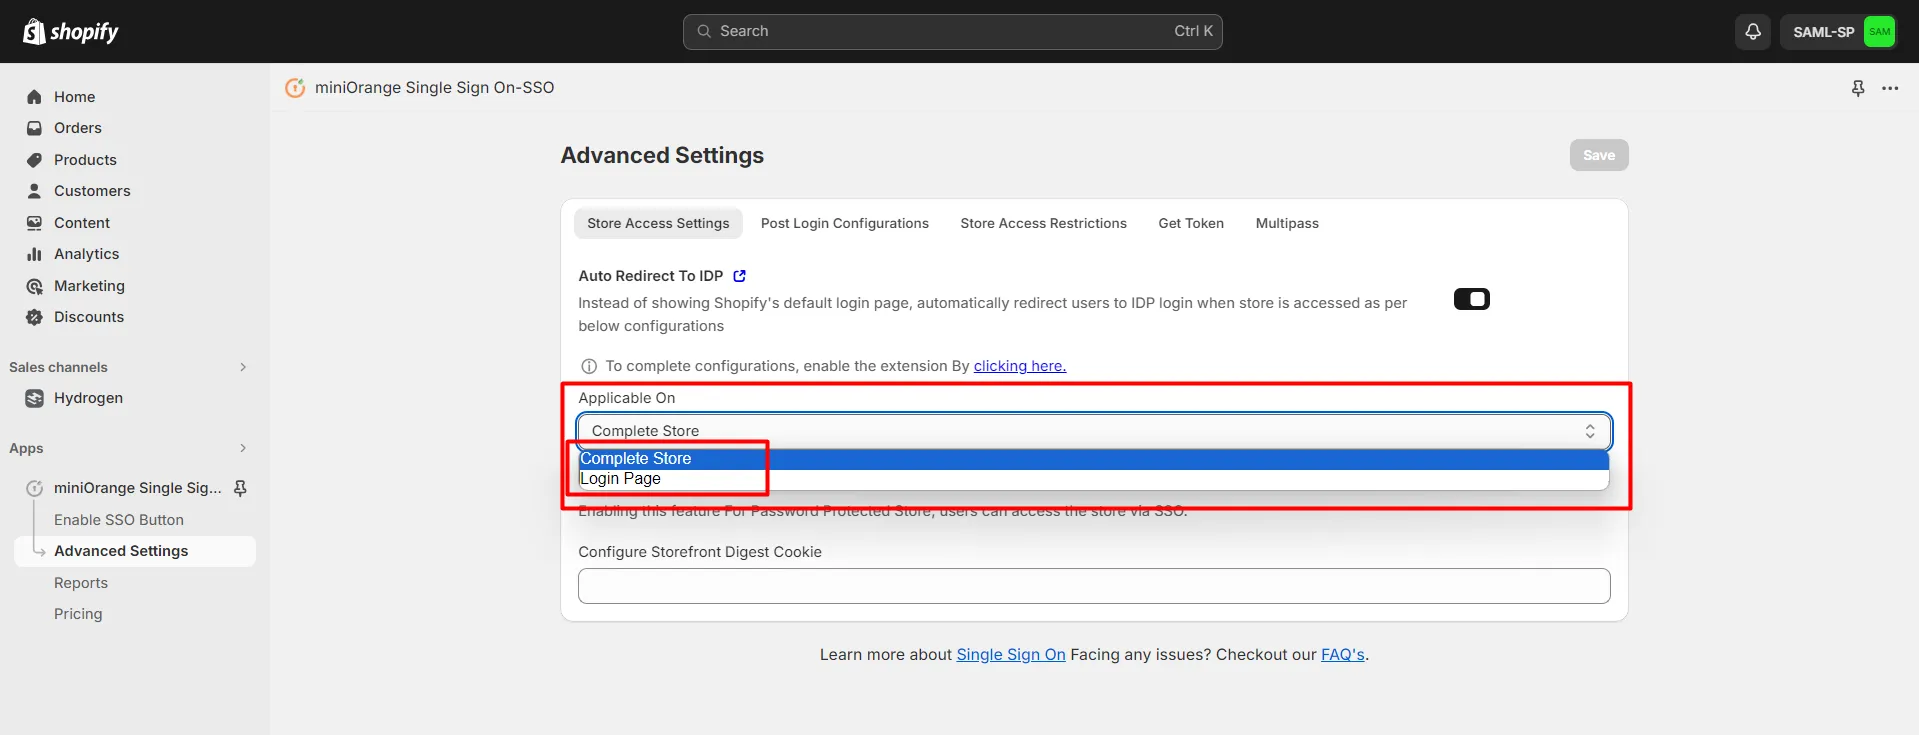
- Choose whether you want to enable this feature on the "Complete Store" or only on the "Login Page".
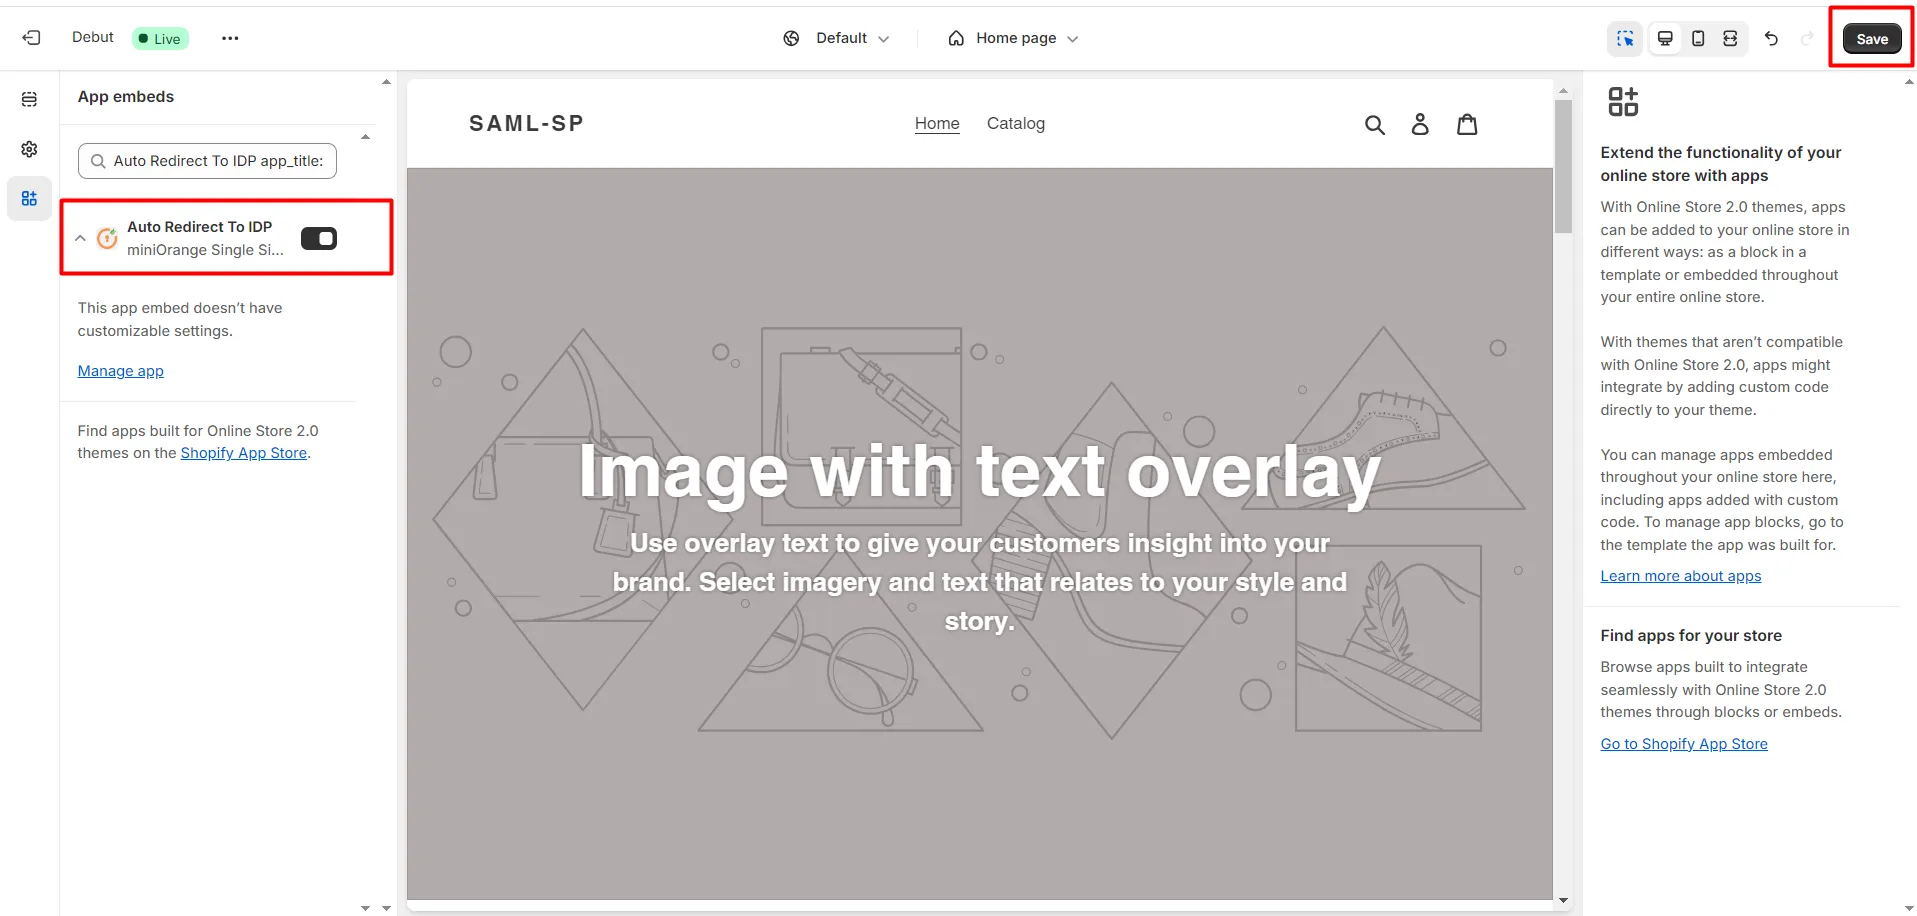
- If you see a warning box to enable the auto-redirect IDP extension, then click on the link as shown in the image below to enable the feature.
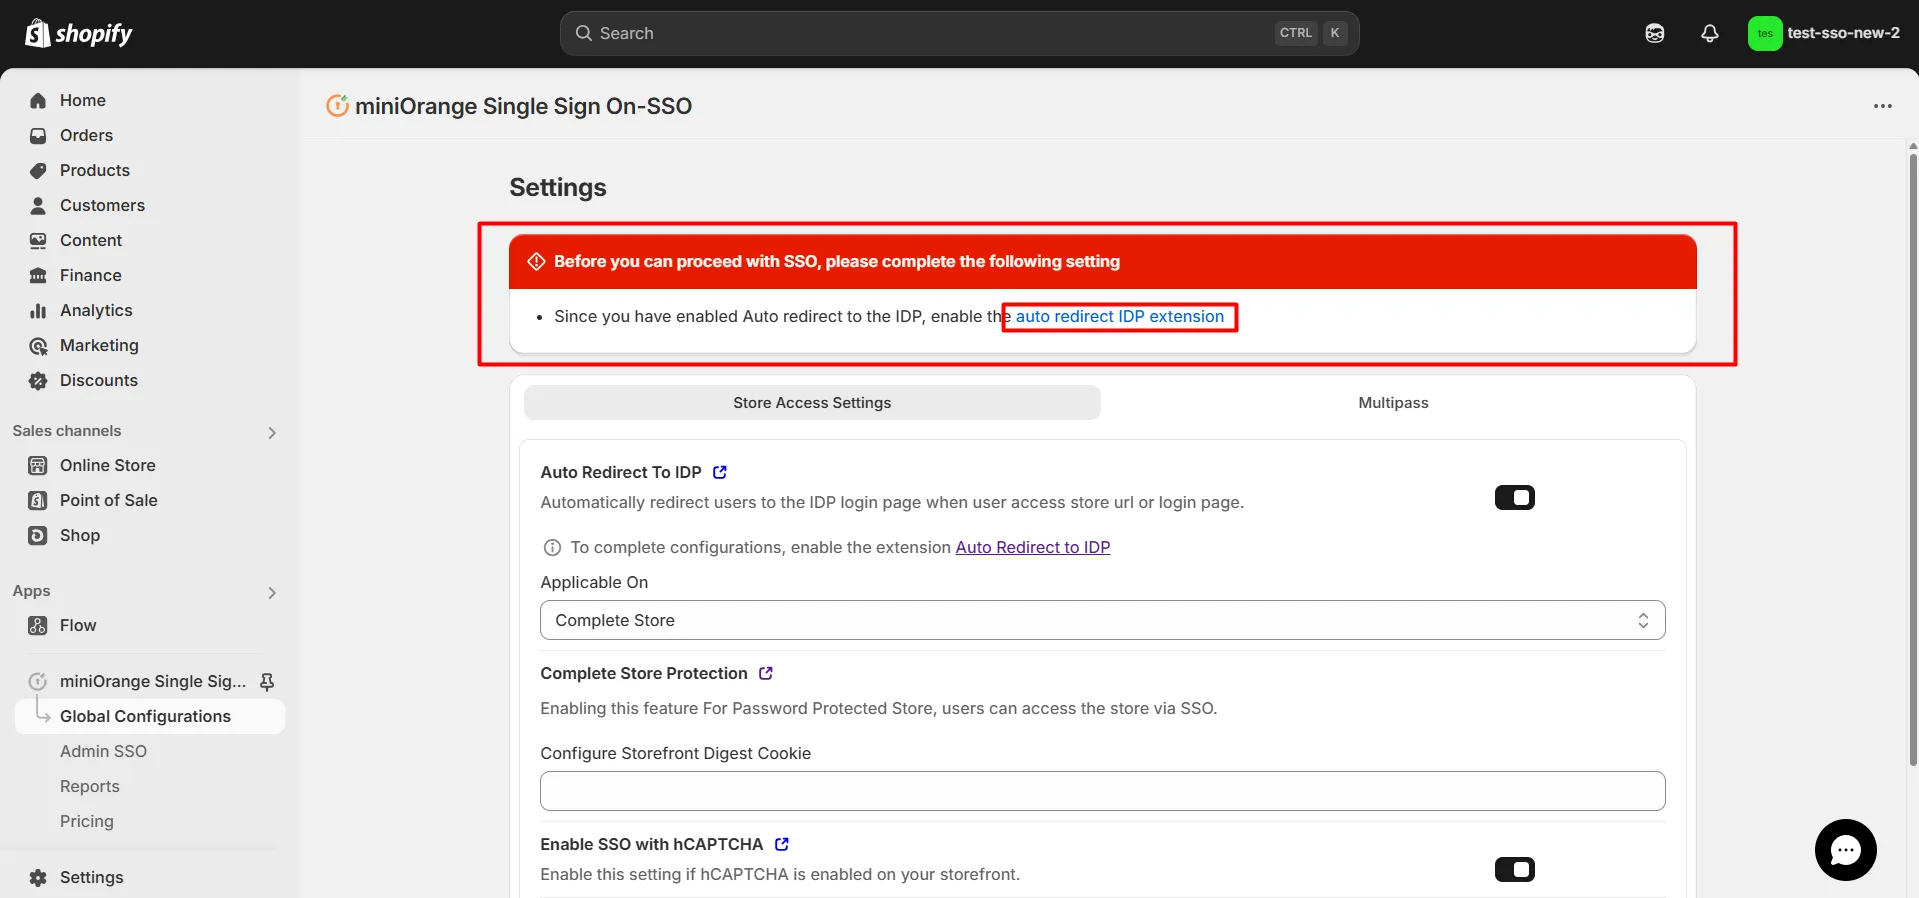
- If the Auto Redirect to IDP feature is not enabled by default, then enable it and click on Save.
- Click on the 3 dots >> Edit Code option.
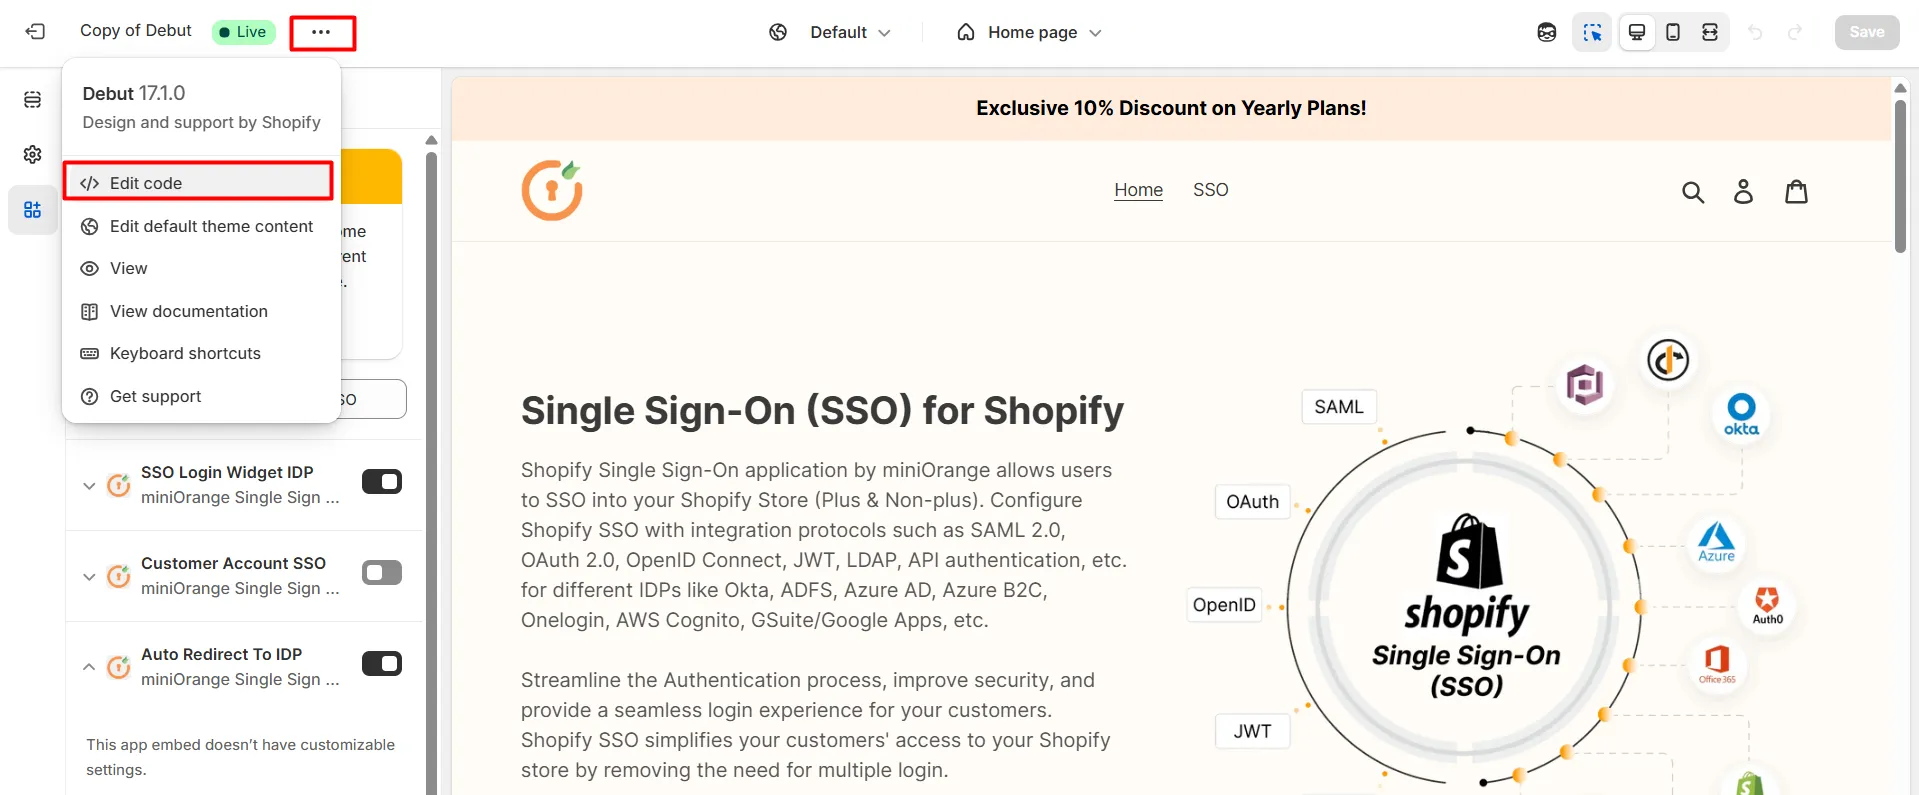
- Open the theme.liquid file and comment down the line of code as shown in the image below.

- Click on Save.
2. Follow the steps below to resolve the Login Widget Extension error:
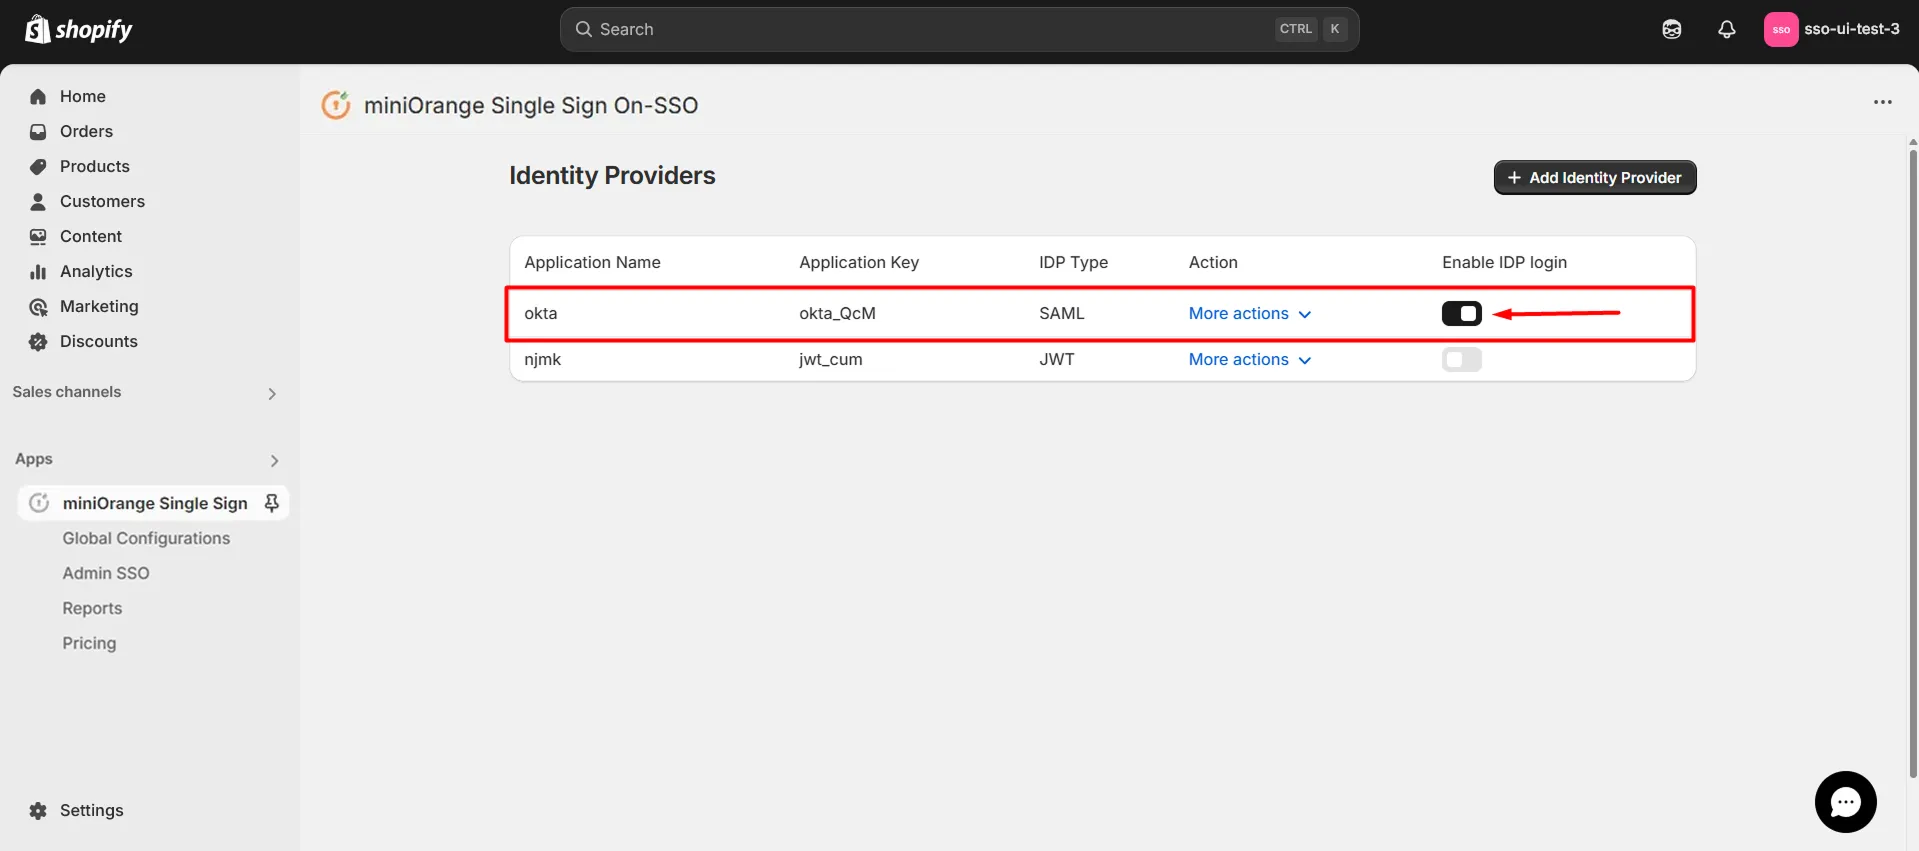
- Open the miniOrange Single Sign-On app in your Shopify store.
- You'll see a list of your Identity Providers (IdPs) with a toggle button.
- First, disable the toggle, then enable it again.
- This will trigger an extension enable error with a link.
- Click the link and enable the extension as instructed.
- You should now see the login widget and be able to perform SSO successfully.
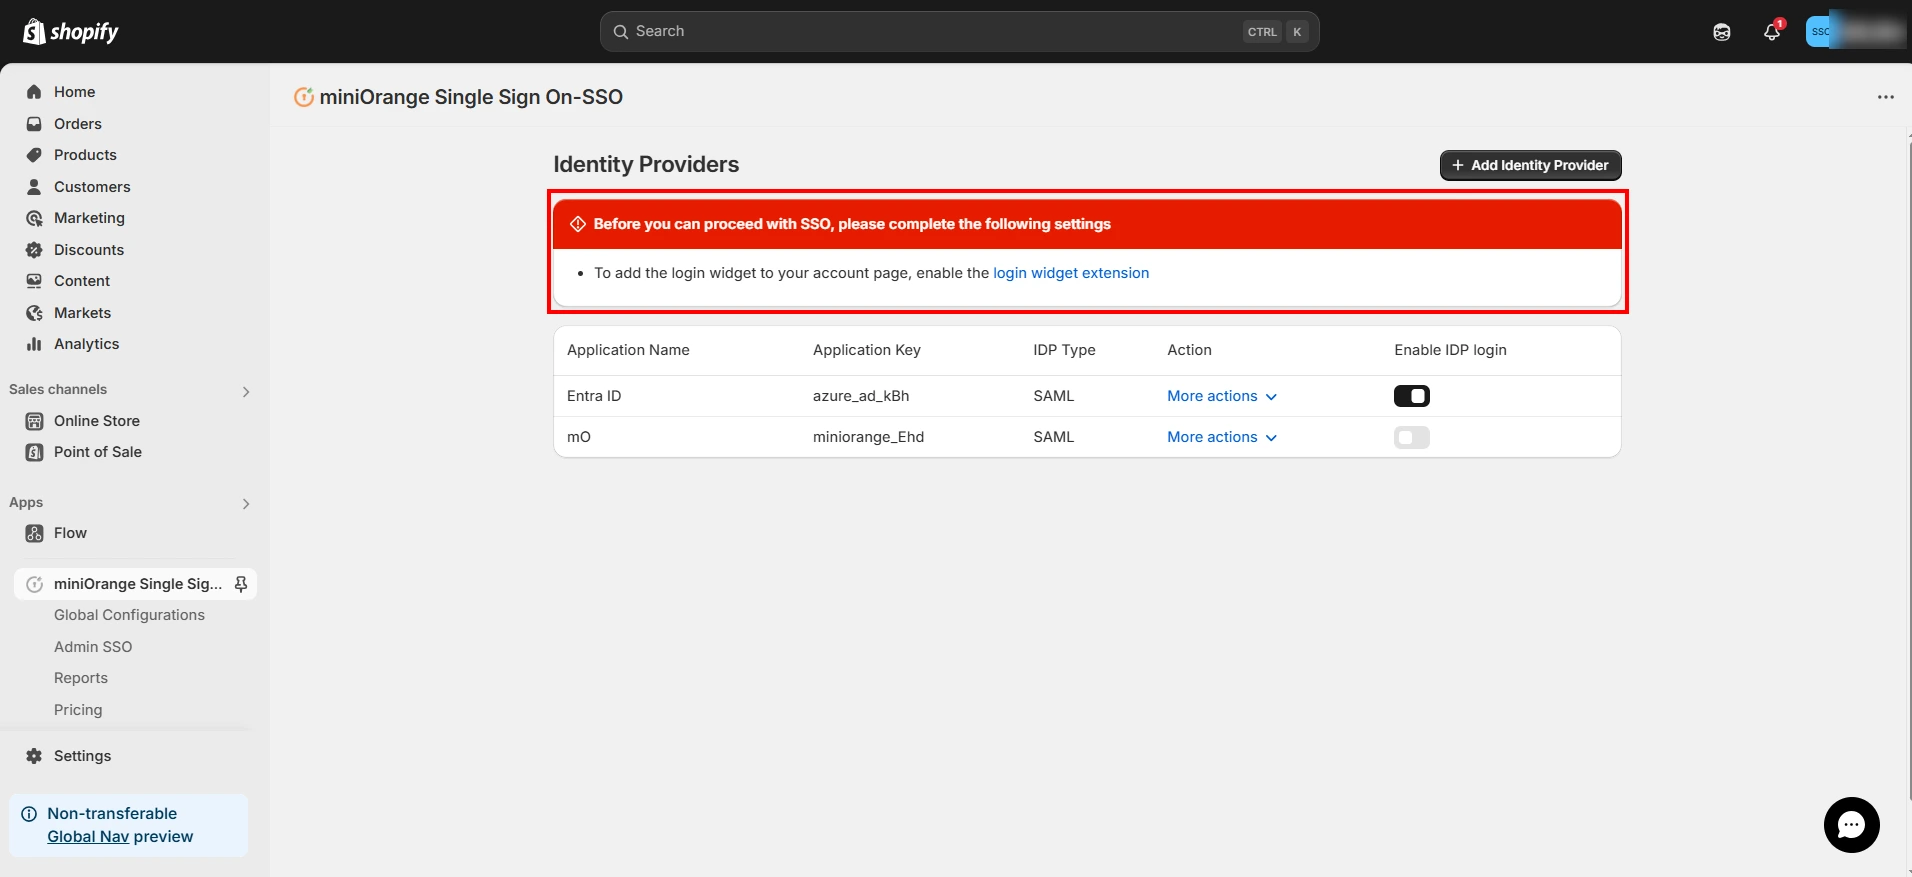
If the error does not appear in Step 4, follow these manual steps:
- Go to the Online Store and click the Customize button on your theme to see the theme editor.
- In the theme editor, click App Embeds from the left navigation panel and search for LOGIN WIDGET.
- Locate the toggle button and enable it. Then follow Step 6 to test SSO.


3. Follow the steps below to resolve the Multipass error:
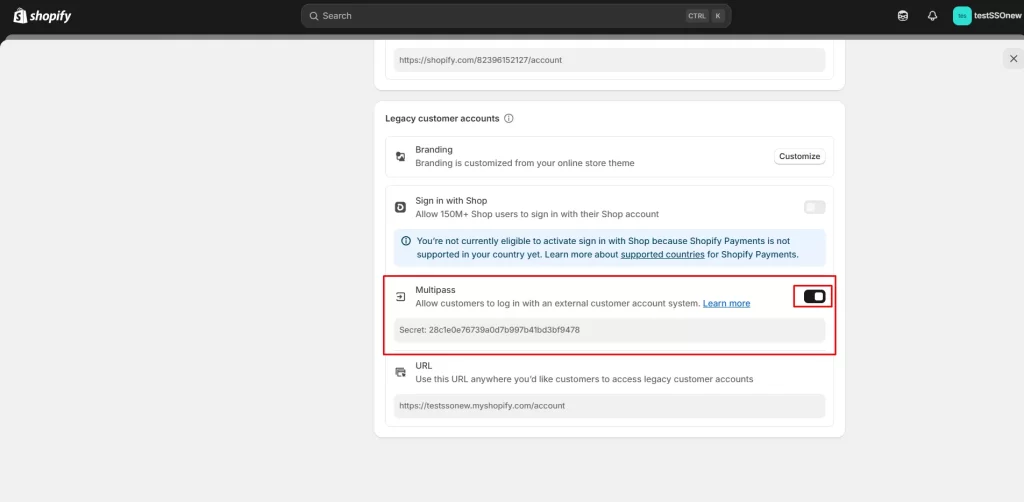
- In your Shopify store, go to Settings, and open the Customer Accounts option.
- Scroll down till you see the Multipass option. Enable it and copy the Secret Token.

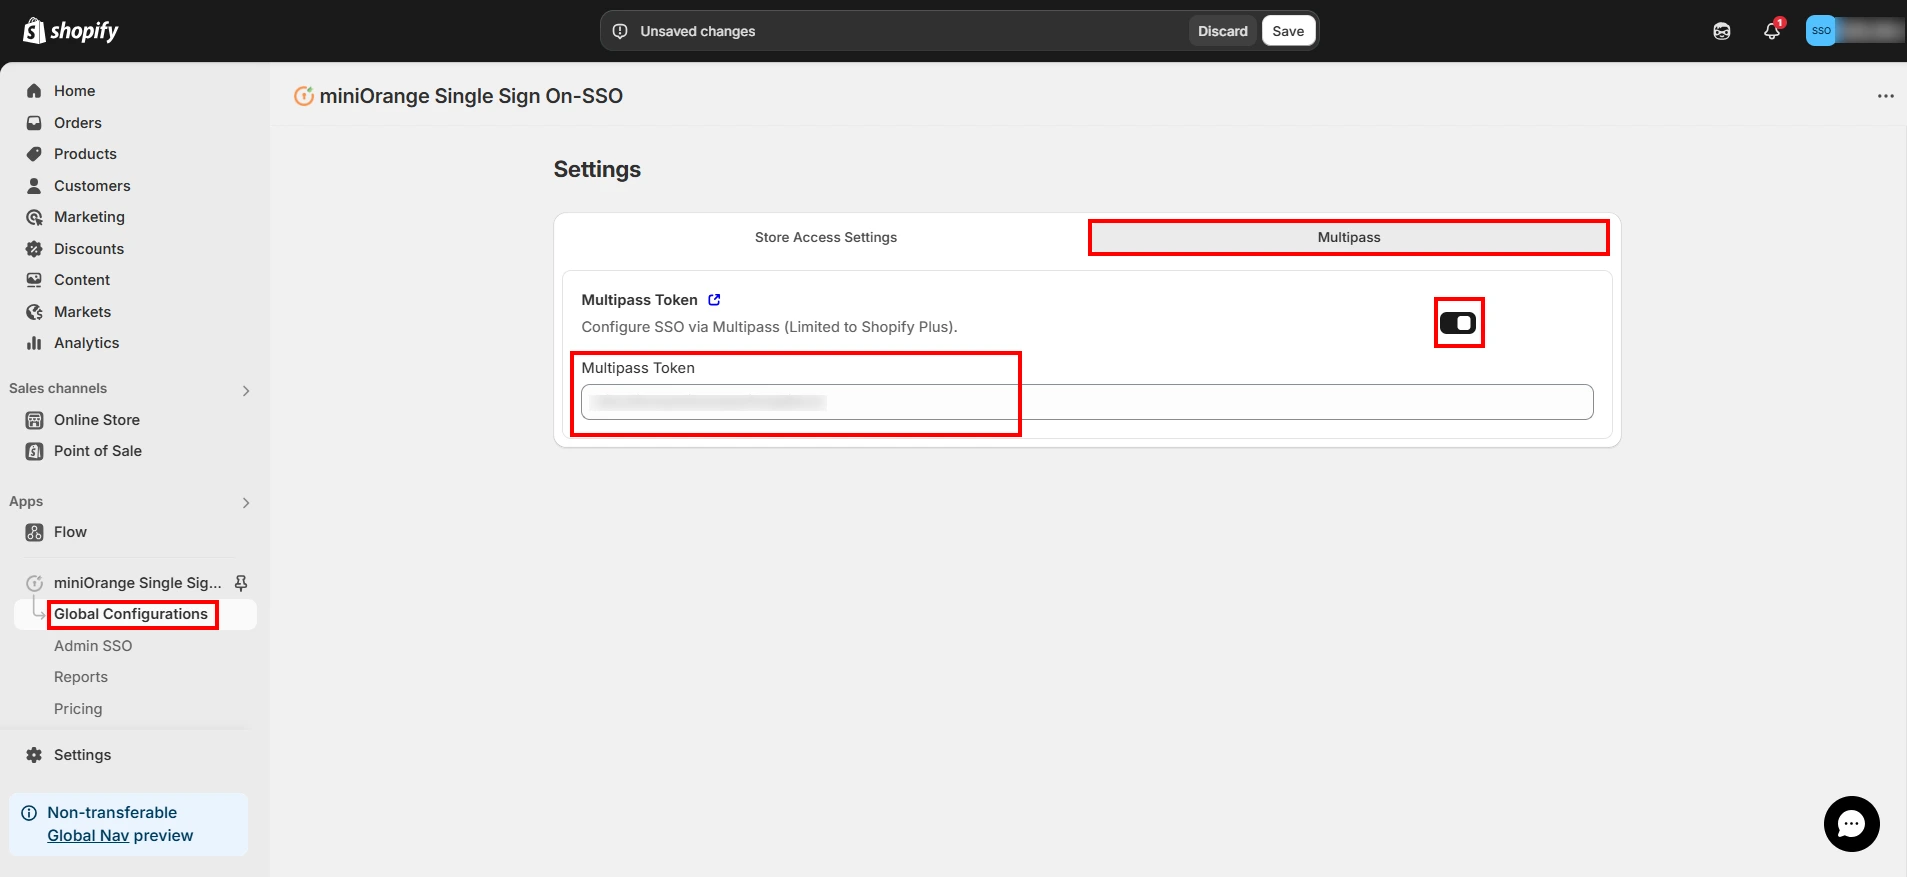
- Go to the miniOrange Single Sign-On app, and open global Configurations from the left sidebar.
- Click on the Multipass tab, enable the feature, and paste the secret token.
- Once done, try logging in from the Online Store to verify that SSO works correctly.
Need help with the configuration? Reach out to us at shopifysupport@xecurify.com, or contact our team.