This generally happens when your Identity Provider changes their X.509 signing certificate after a few months.
The Premium and Enterprise version of our SAML SP SSO plugin for WordPress provides an IdP metadata auto-sync feature using which the plugin's settings can be auto-updated after every fixed interval of time.
Steps to enable auto-sync IdP's metadata in WordPress SAML SP SSO Premium/Enterprise plugin:
- Navigate to IDP Configuration tab of the plugin and click on Upload IdP Metadata button.
- Enter the Identity Provider Name and metadata URL.
- Enable the Update IdP settings by pinging metadata URL option.
-
Select a time interval for syncing the plugin’s configuration as per IdP metadata.
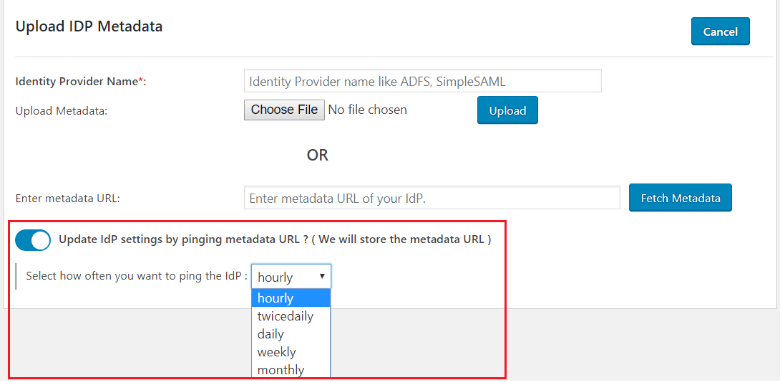
- Finally click on the Fetch Metadata button.
Still need help?
If you are facing any issues with the SSO then you can share the screenshot of the test configuration window along with plugin configuration with us through email at samlsupport@xecurify.com