Please note that just installing the latest version of the plugin will not replace the certificate immediately. Your SSO
will continue to work with the old certificate unless you update it by following the steps provided below.
Case 1: Plugin version 16+
Case 2: Plugin version less than 16
Case 1: If you are already on 16+ versions of Standard plugin then follow the steps below:
-
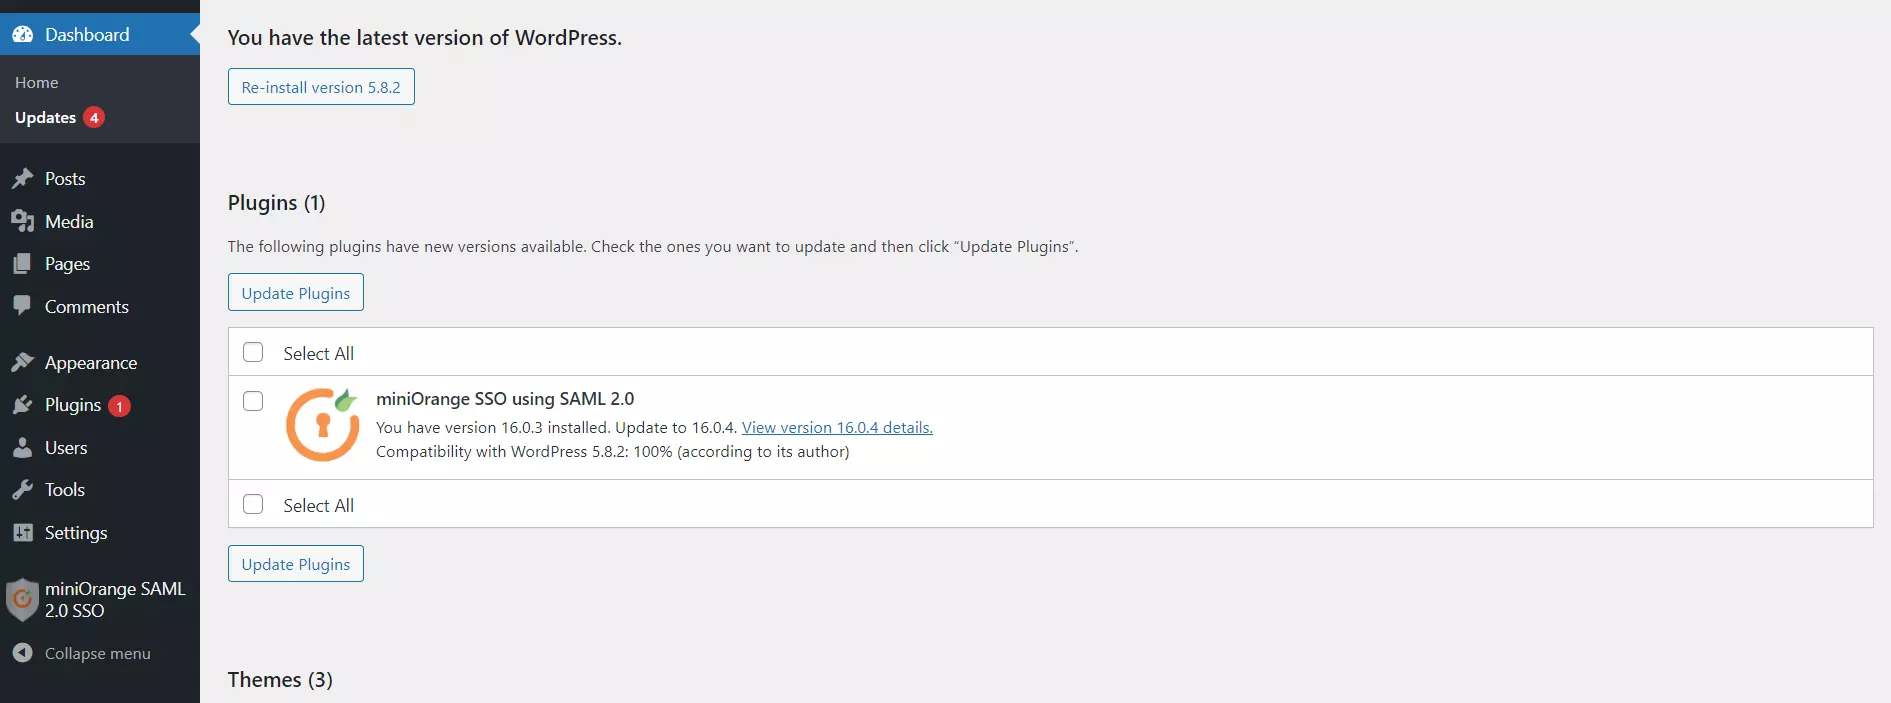
- Go to Dashboard>>Updates section of WordPress.
-
- Select miniOrange SSO using SAML 2.0 from the list and click on Update Plugins.
(Note: If you can’t see miniOrange SSO using SAML 2.0 in the list. Then click on Check again button)
- To update the certificate, follow the steps here
Case 2: If you are on lower versions (<16) of Standard plugin then follow the steps below:
-
- Click here to log in to your xecurify/miniOrange dashboard.
- Navigate to Downloads from the left section.
- In this section, you can download the latest plugin using the available links. If a download link is unavailable, it indicates that your license has expired.
Note: To renew the license contact us at samlsupport@xecurify.com

- Installation:Replacing the new plugin using FTP:
- After downloading the plugin(.zip) from the miniOrange dashboard.
- Connect to your WordPress site via FTP and got to <wp-installation-path>/www/wp-content/plugins
- Take the backup of the installed plugin – miniorange-saml-20-single-sign-on.backup
- Extract the zip file. Make sure the folder name is miniorange-saml-20-single-sign-on
To update the certificate, follow the steps below:
Once the latest version of the plugin is installed, then you can follow the steps below to update the new
certificate:
-
- Go to the Manage Certificates tab in the miniOrange SAML plugin.
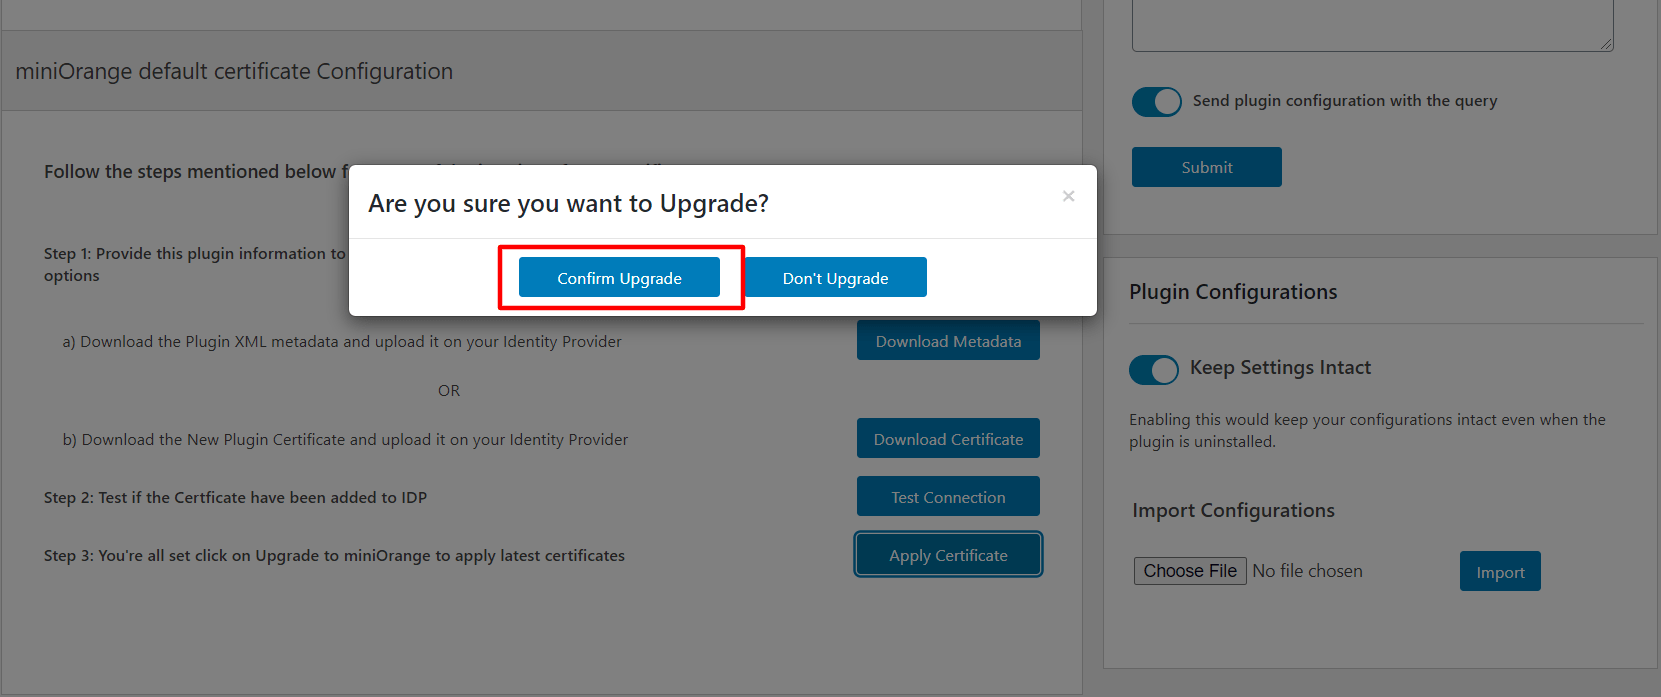
- Under Manage Certificates tab, download the new certificate or download the metadata as given below in the screenshot.
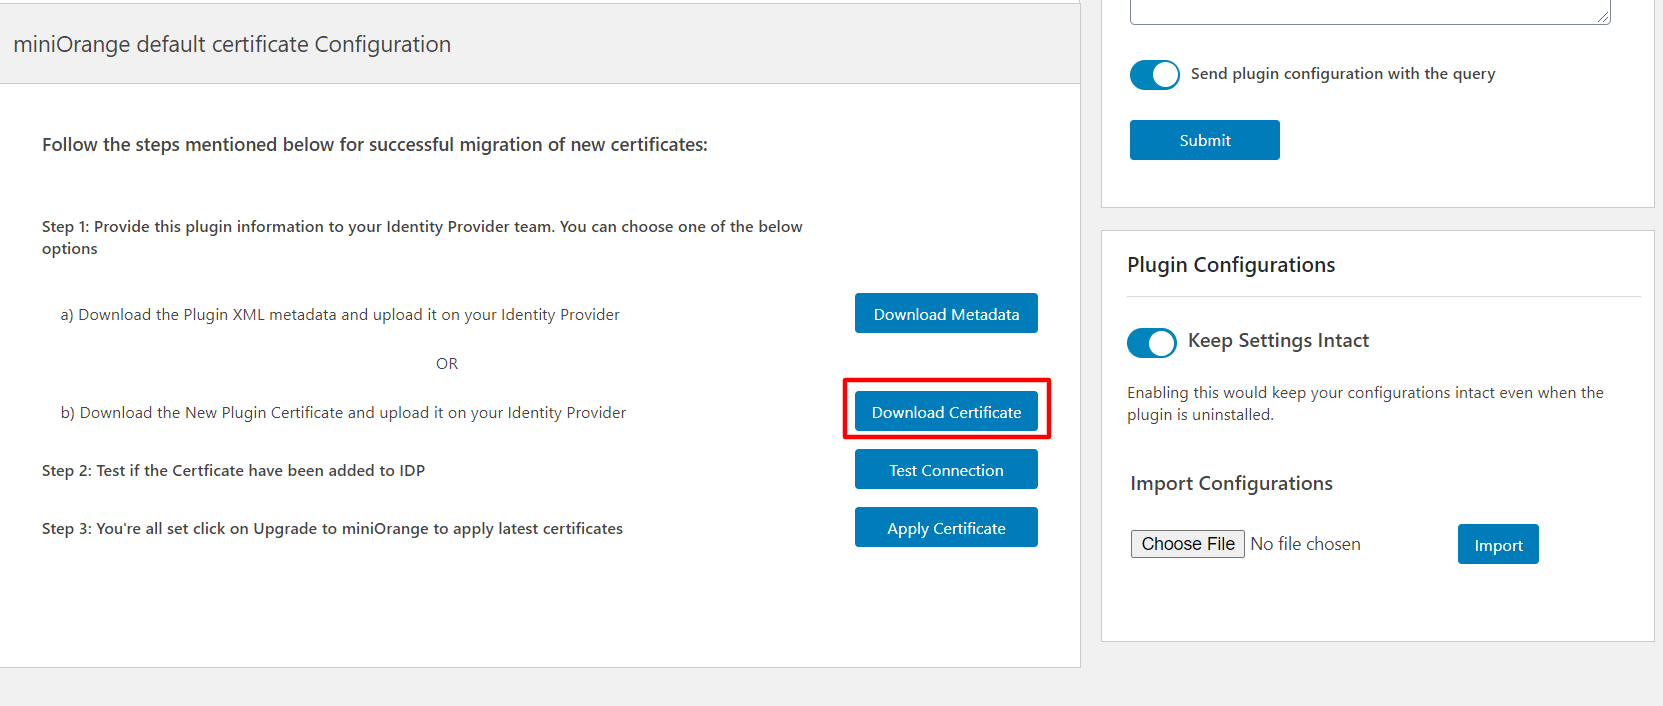
-
- Upload this certificate to your IDP. If your IDP is looking for metadata then you can provide the metadata file
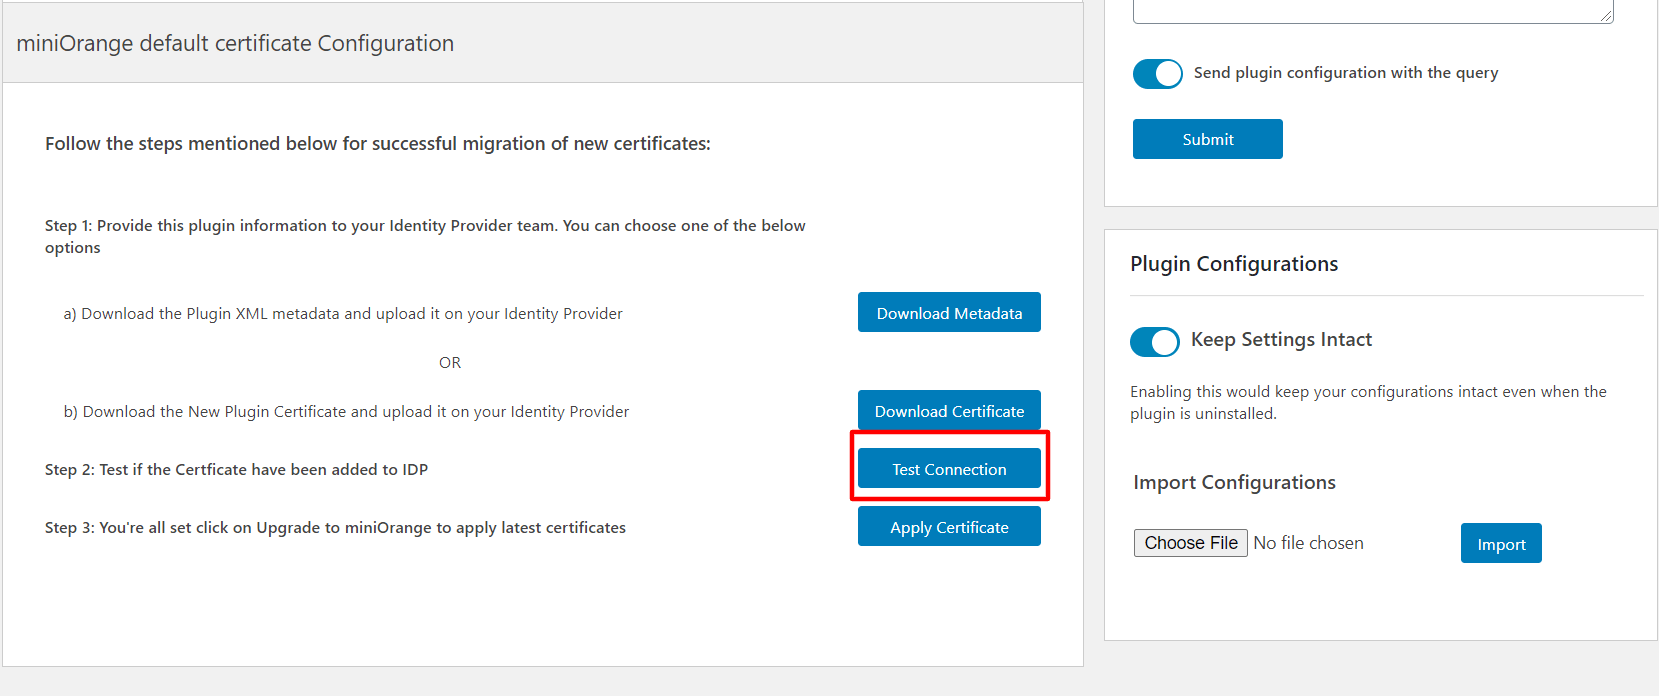
download in the previous step. This metadata contains the new certificate. - After uploading the certificate. Click on Test connection to check if the uploaded certificate is working
properly.
- Upload this certificate to your IDP. If your IDP is looking for metadata then you can provide the metadata file
-
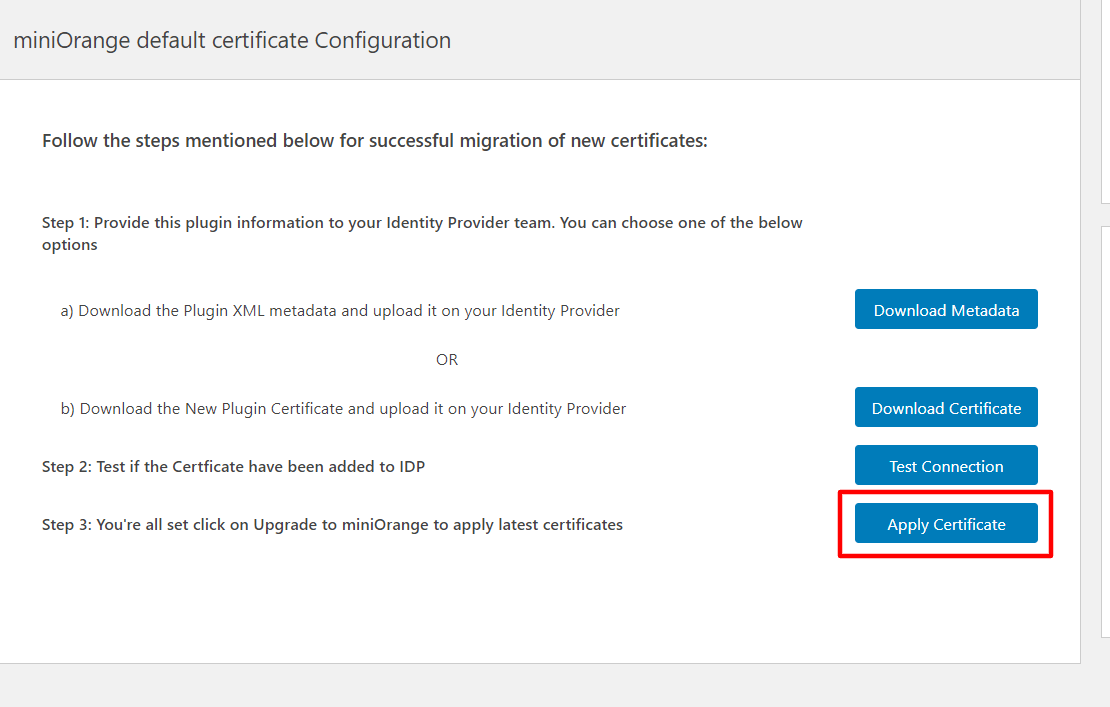
- If the test is successful then only click on Apply certificate and Confirm Upgrade.
If you are still facing the issue, you can reach out to us at samlsupport@xecurify.com